
In part 1 and part 2 of this series, we covered the basics of bringing in audio, making loops, and editing loops in Ableton Live. Hopefully, you enjoyed the project, thus far, and you've since used it to bring in many loops of your own. If this isn't the case, that's fine, we have plenty more to cover.
In this particular tutorial, we're going to take a look at actually making our own beats, using the drum rack within Ableton Live. But, the way that we're going to go about exploring the drum rack may surprise you. But, before we get started, let's reacquaint ourselves with a bit of history, shall we?
The Early Days of Sampled Beats
In the mid 90s, thanks to the full emergence of the sampler, sampled loops were all over the place in musical recordings. This was especially true for Hip-Hop. Sampled beats, in many cases, replaced the turn tables... Well, at least on the albums. Because the trend was so popular, many savvy producers started putting out libraries of loops of their own. And, because when you bought the CD, DVD, or whatever it might have been, you bought the rights to use the loops, sounds, fx and more that came with.
Granted, there still were many artists faithfully moving through their parents old record collections, eager for a hidden drum loop in their somewhere. This is, of course, a practice that carries on to this day, in many cases.
During this time in the 90's, one emerging company, known as Propellerhead, noticed a trend and put out a piece of software called Recycle. This software was a Godsend, because it gave one the ability to have the computer, which was still relatively new to the recording studio, analyze loops, break up the different beats in to individual sounds, and then allow one to play back the loop as MIDI.
It actually did, and still does a bit more than that, but the important thing to note is that this type of feature exists in Ableton, independently of Recycle. In fact, it's not Recycle at all, it's just a feature that's similar, and quite cool. Let's explore this together now.
Slice to New MIDI Track
If you bring up the session from the last article, you should have one loop that you brought in, or maybe you even used the loop that I did. Regardless, you have one loop, and that's what we'll use.

As promised, we will be creating a beat over the top of our existing loop, but we're actually going to make the beat with a kit created from our current drum loop. To do this, I'll right-click on the current loop and select 'Slice to New MIDI Track'.

Once you select this function, Live will prompt you with a couple of questions. The first question is 'Create One Slice Per...” The default will be 'Transient'. For example's sake, this is fine. But, you can choose to go with Warp Markers, 16th notes, 8th notes. Transients is fine, because Ableton actually analyzes the peaks in the loop, and breaks each 'hit' up accordingly in to individual audio files. If this seems confusing, stay tuned, it will make more sense in a second. It will also ask which Slicing Preset to use. I'd recommend staying with 'Built-in' for demonstration purposes. It's quite comprehensive and does a good job.
Welcome to Your New Drum Kit

Once you press the OK button, you'll get a box that appears telling you that Ableton is 'slicing.' Once it's complete, you'll notice a brand new track sitting next to your original drum loop. However, if you double-click on this loop, you'll notice that it's not audio. It is, in fact, MIDI.

This means that the audio you originally had Ableton analyze, in a sense, has been turned in to MIDI. What's really happened is that every transient within your loop has now been sliced, diced and placed in to a Drum Rack that you'll see at the bottom, if you double-click on the track name at the top of the track.

The really interesting part of all of this, is that if you try to play your MIDI controller, or simply press your QWERTY keyboard, which is, by default, set up as a MIDI Controller in Ableton, you'll be able to trigger individual slices from your loop, like you're triggering a drum machine. Try pressing from the A key on your keyboard through to L. All along that row of keys.
See? You have a new drum kit made from a loop. It is now possible to create new beats through MIDI recording, or you can even play along with the original loop!
Copy it First
I would suggest trying this, for exercise purposes. Hold down the Option key on your QWERTY keyboard and then drag the new MIDI loop down one box...

Doing this will create a copy of the MIDI loop. This also works for audio loops, just in case you're curious. Once the copy is made double-click on the MIDI loop. This will bring up the MIDI notes again at the bottom.

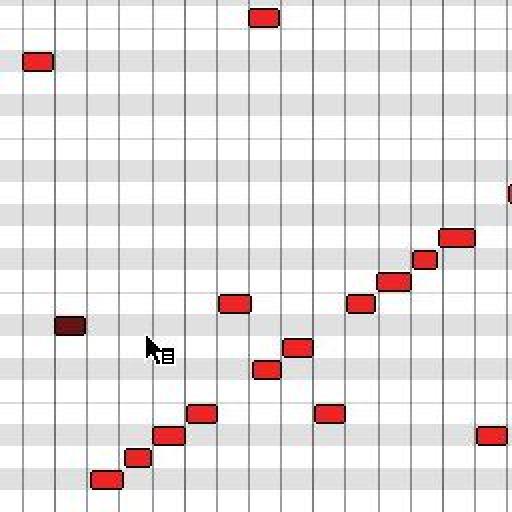
Now, for fun, try changing some of the notes around on the new copy of your MIDI loop. Or, use the Pencil tool (Command-B) to draw in some more drum hits...

This can be a great way of creating amazing new drum loops of your own, from the dregs of another. In fact, you can even save the Drum Rack, and use it as a kit later on!

Think about it, using Ableton Live, and your large collection of drum loops, you could quickly, and easily have a drum library that will blow people's minds... And, it took you no time at all to create.
Conclusion
Ableton, you may be starting to notice, is a very deep and slippery rabbit hole. Functions like the one we visited in this tutorial alone, can add hours of tweaking, and kit making... And, we haven't even gotten to the other stuff yet.
In the next article, let's spend a little extra time looking at MIDI recordings. In the meantime remember to save your session!
Quick links to the jump to each article in the series:
Hip Hop in Ableton, Part 3 (you're here!)
Hip Hop in Ableton, Part 4 (coming soon)

Discussion
i'll stay tuned for the next part
Want to join the discussion?
Create an account or login to get started!