
We’ve probably all heard the old adage “a little knowledge is a dangerous thing”—it means that people often think they know more about something than they really do, and not knowing what you don’t know can cause all sorts of problems. This is especially true in technical fields, and the music/recording industry is no exception. Some budding recordists/engineers/producers take full-length courses in the art of making a record, and hopefully they’re presented with lots of helpful details about not only how to perform the basic activities of a recording/mixing/mastering session, but also what kind of potential issues to look out for as well.
But many people are self-taught, often with the help of internet resources—there’s no shortage of material out there to help newbies get their feet wet—but as we all know, this kind of piecemeal approach can often leave a person with a little less than the fullest understanding of how to best approach many of the tasks they’ll be doing on a daily basis in their studios. With that in mind, here are a few areas where many people are likely to have a basic working knowledge of how to do a particular task, but not enough to do it as well as they’d like. I’ll start off with some of the activities of recording itself—the first step in the chain.
Sound Check
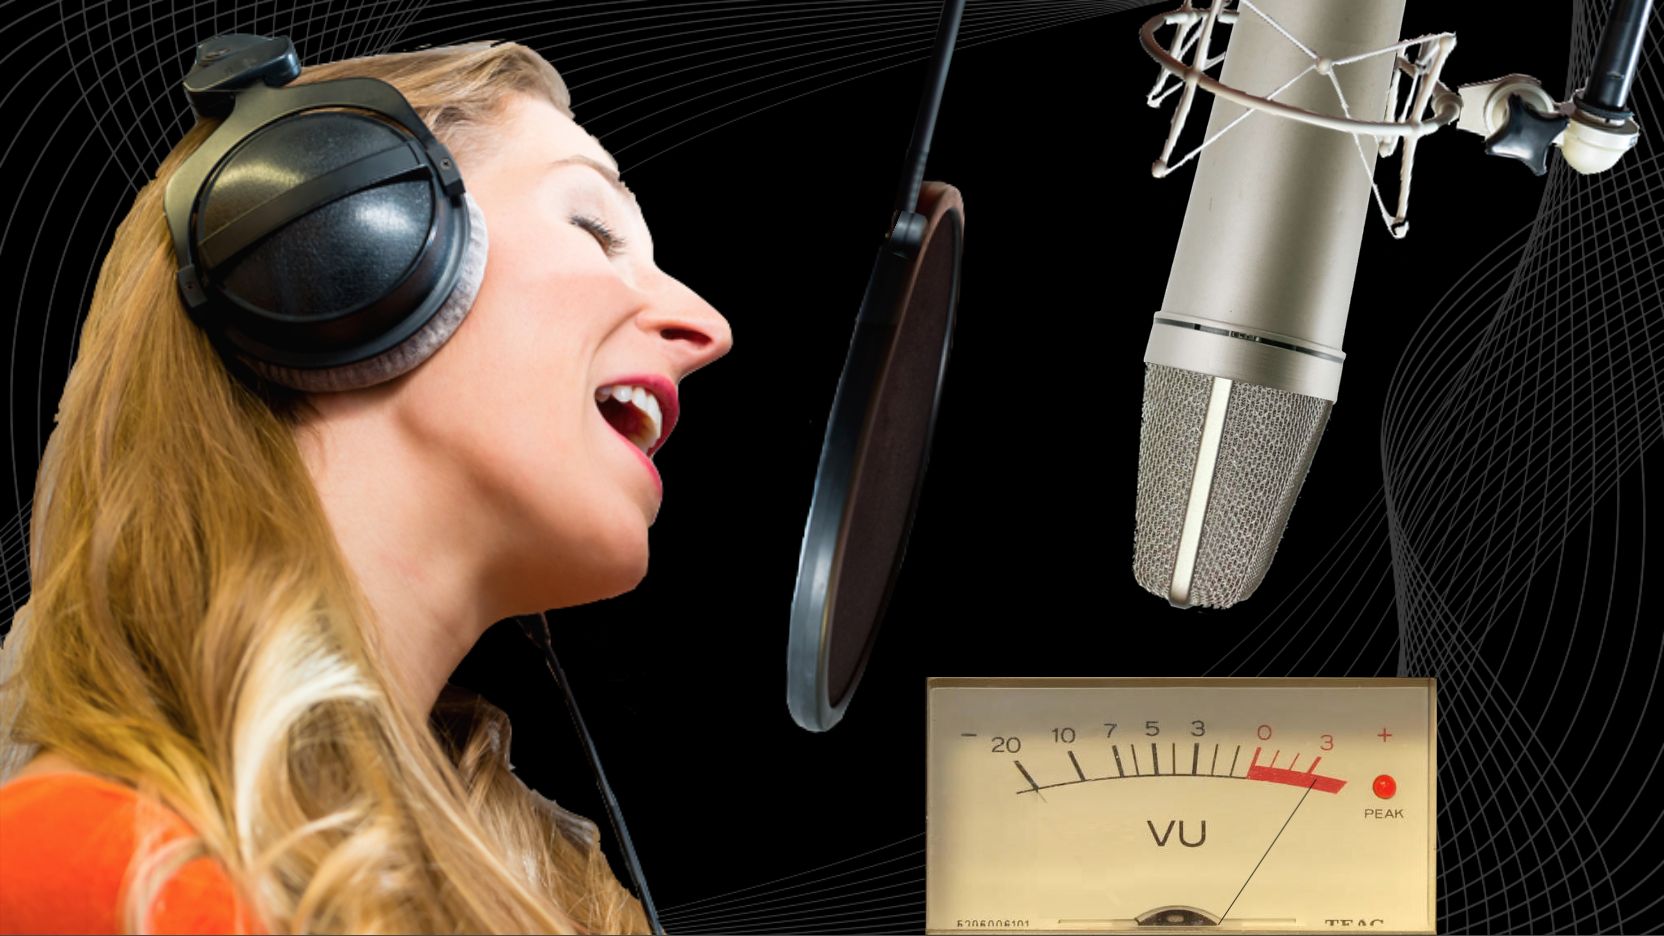
Most everyone knows to carefully test and set the level of the signal to be recorded before the recording begins—the phrase “testing 1, 2” is a familiar refrain. And everybody also knows that the level should approach the maximum level before overload, for a strong, clean signal. But that little bit of knowledge leaves a lot of specifics open to interpretation, and doesn’t necessarily anticipate a common problem.
First off, just how close to maximum level (the red line) should the meter be allowed to go? Well, that depends on the source and the recording medium. In the analog era, people used to often record things like drums a little into the red, to take advantage of the warming effect of analog tape saturation. But of course, in the digital era, hitting the red on the DAW’s input meter in recording is an absolute no-go—digital clipping must be avoided. So often, a recordist will have the singer sing or the player play their loudest bits of the song at hand, check the meter, and set an appropriate level a couple of dB below the red line.
And that’s all well and good, but what they may not anticipate is that very often when the red light goes on for real and an actual take begins, many performers dig in to the part with a lot more intensity than they put out in the sound check, and levels already close to the limit can easily go over it, distorting and ruining the take (and we all know how the first take is often that magical, perfect performance that can’t be duplicated!).
Experienced recordists know to always anticipate this, and subtract about 3 to 6 dB from the hottest sound check level, just in case. And you don’t have to worry about capturing too low a level—with today’s 24-bit recording, even slightly lower-level recordings can be easily and cleanly boosted if needed—a DAW recording level of anywhere from -12 to -6 dBfs will be just fine.
Vocal Issues
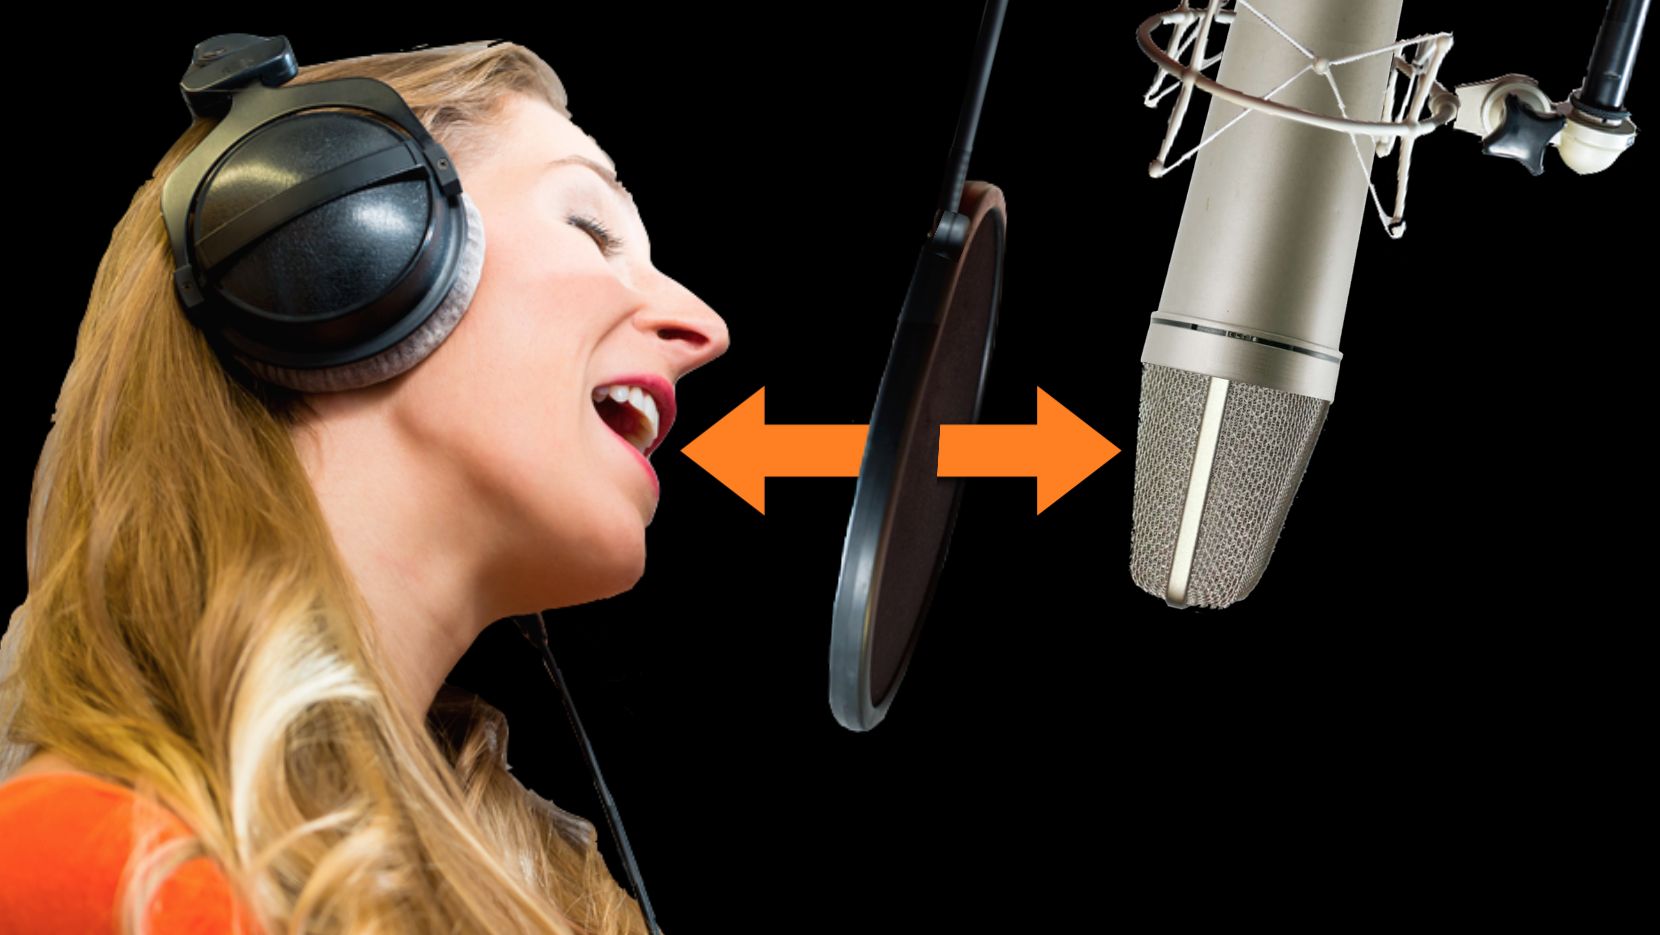
Recording a vocal in the studio is pretty straightforward these days—get a suitable mic (usually a large-diaphragm condenser), set it up in front of the vocalist, get a level (as above), and hit the red button. But this basic knowledge still leaves a number of variables and potential pitfalls.
First off is mic distance. While some performers like to use a handheld mic even in the studio, and you can get a decent recording this way if you’re careful, the best approach is to put the vocalist around a foot away from a proper studio mic, for a more even, well-balanced tone. This will help avoid problems like excessive proximity effect (the often-tubby bass boost that happens with standard directional mics). Distance can also help avoid plosives—a.k.a. p-pops, those thumps on the letters “p” and “b”. But even at 6” to a foot away, sometimes they’ll happen anyway—in fact, it’s rare to see a session that doesn’t use an external popscreen as a matter of course.
Another less obvious issue with vocal recording can come about when multiple takes are recorded—common practice in most sessions. Many vocalists tend to move about a little while they perform, and over the course of several takes their distance and angle from the mic can change just enough to result in inconsistent tone from multiple takes—this can make it more difficult later on to perform an effective comp (where bits of multiple takes are assembled into a final “perfect” take). It’s not enough to keep an eye on level, the recordist also needs to watch out for this, and gently nudge the vocalist back into position—it’s common to mark an “X” on the floor in front of the mic, and occasionally check and remind the performer to stay on his/her mark.
The Cue Mix

With typical close-miked recordings and overdubbed parts, everyone knows that they’ll have to feed a cue mix (monitor mix) of the song into the performers’ headphones during tracking. But often that’s all a novice engineer knows about it, and they give this important step short shrift. It’s common to see a recordist simply feed the same thing he’s hearing at the console/computer into the performer’s cans, but most players/vocalists require a dedicated version of the mix tailored specifically to their needs.
It’s important to create a separate mix for the performer (ideally for each performer in a larger session, though that’s not always possible). This is usually done by dialing up the cue mix on pre-fader Sends either in the DAW mixer (fed out through extra outputs on the interface), or via an external analog mixer. The monitor mix can be tweaked to offer the performer a mix that emphasizes or omits certain parts, to provide a more helpful balance.
Another issue often overlooked regarding the cue mix is latency. If that mix is coming from the DAW, the recordist needs to check how much latency (delay) the performer is hearing in their phones on their own instrument or voice, and lower the interface’s Buffer Size appropriately for the lowest latency possible, or provide the cue mix from a pre-DAW analog mixer which will have no latency at all. This last problem is often overlooked by novice recordists, and it can potentially have a detrimental effect on the performance.
Multiple Takes
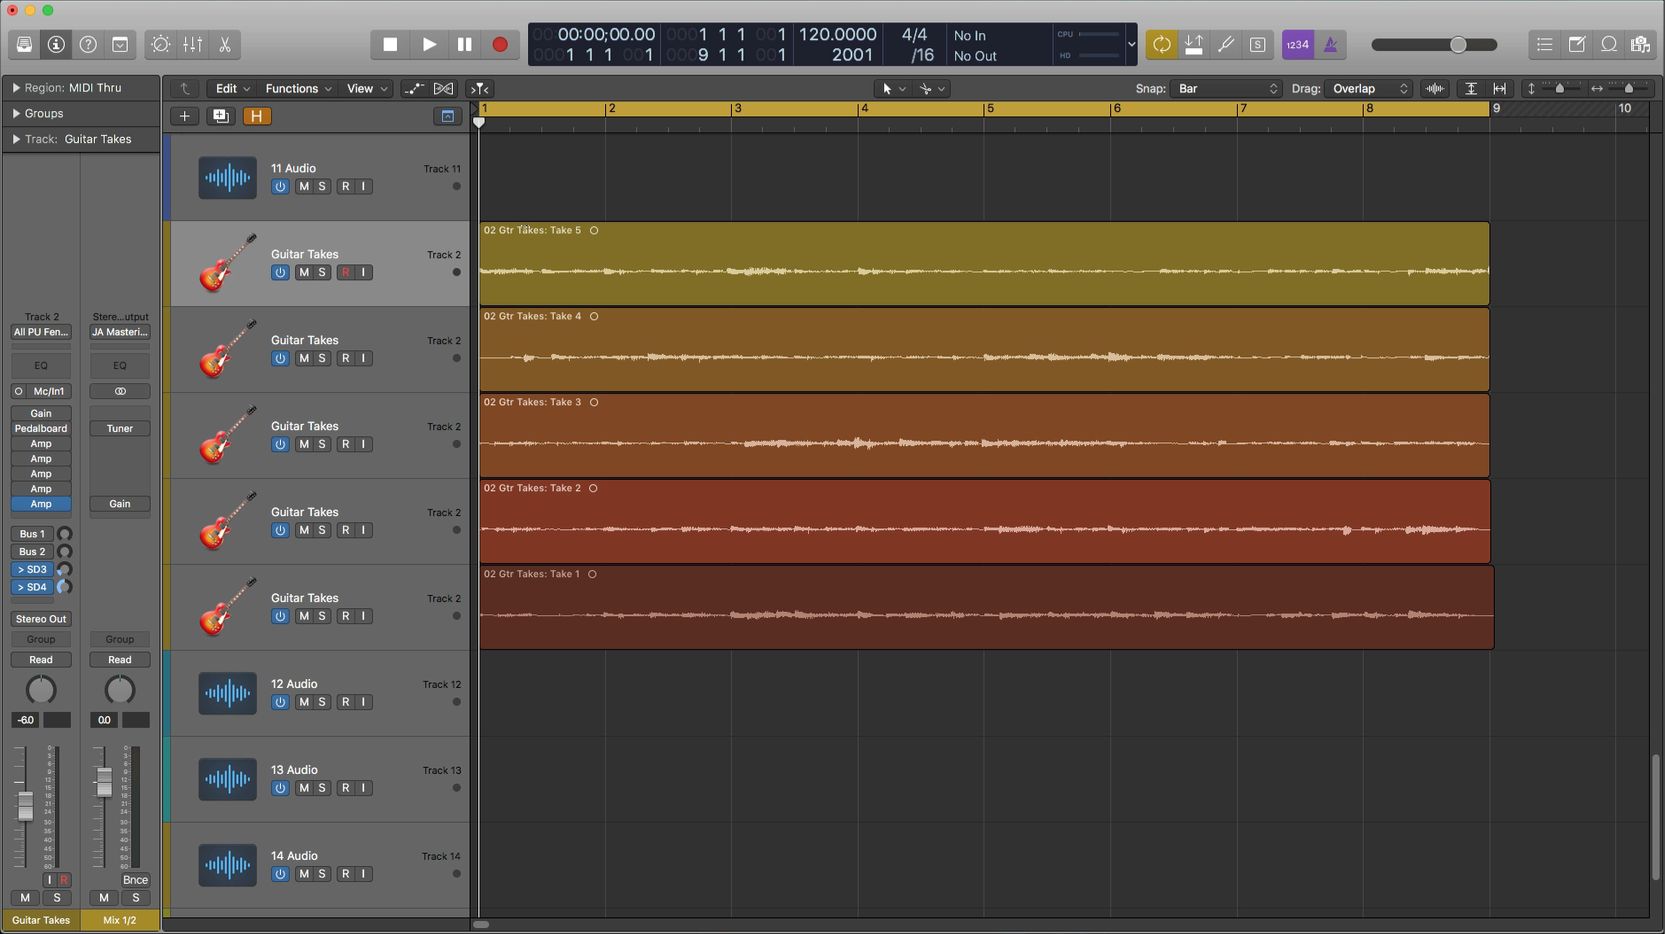
S.O.P these days is to record multiple takes of a part—especially from vocalists—and comp them together later, taking the best bits from each take and forming one “perfect” final take. But often a newbie engineer/producer will keep pushing the performer for another take and another take, without factoring in the effect this could have on both overall performance and later comping issues.
It’s important to be aware of how a particular performer reacts to multiple takes. I know one guy who’ll happily do take after take, and actually gets better as he goes (!), but most performers have only a certain number of takes in them at a sitting, and then they’re likely to be shot for the day (at least on that particular part). It’s important for the recordist/producer to keep and eye and ear out for two things: how is the singer’s voice holding out; and how is their energy level.
You don’t want a singer to blow out his/her voice for the day on one track, especially if they have to do other parts as well. And it’s also important to notice if the performer’s energy is flagging, and their later takes are starting to lose something. Often, recordists/producers get fixated on one aspect of the performance (like a particular problem phrase), and lose track of the overall arc of the part—at a certain point it may become clear to a more observant recordist that the performer is not getting better, and has probably already done his/her best work for the day. In those cases it’s better to put that track aside and come back to it later or the next day if needed, rather than flogging the proverbial dead horse
DI
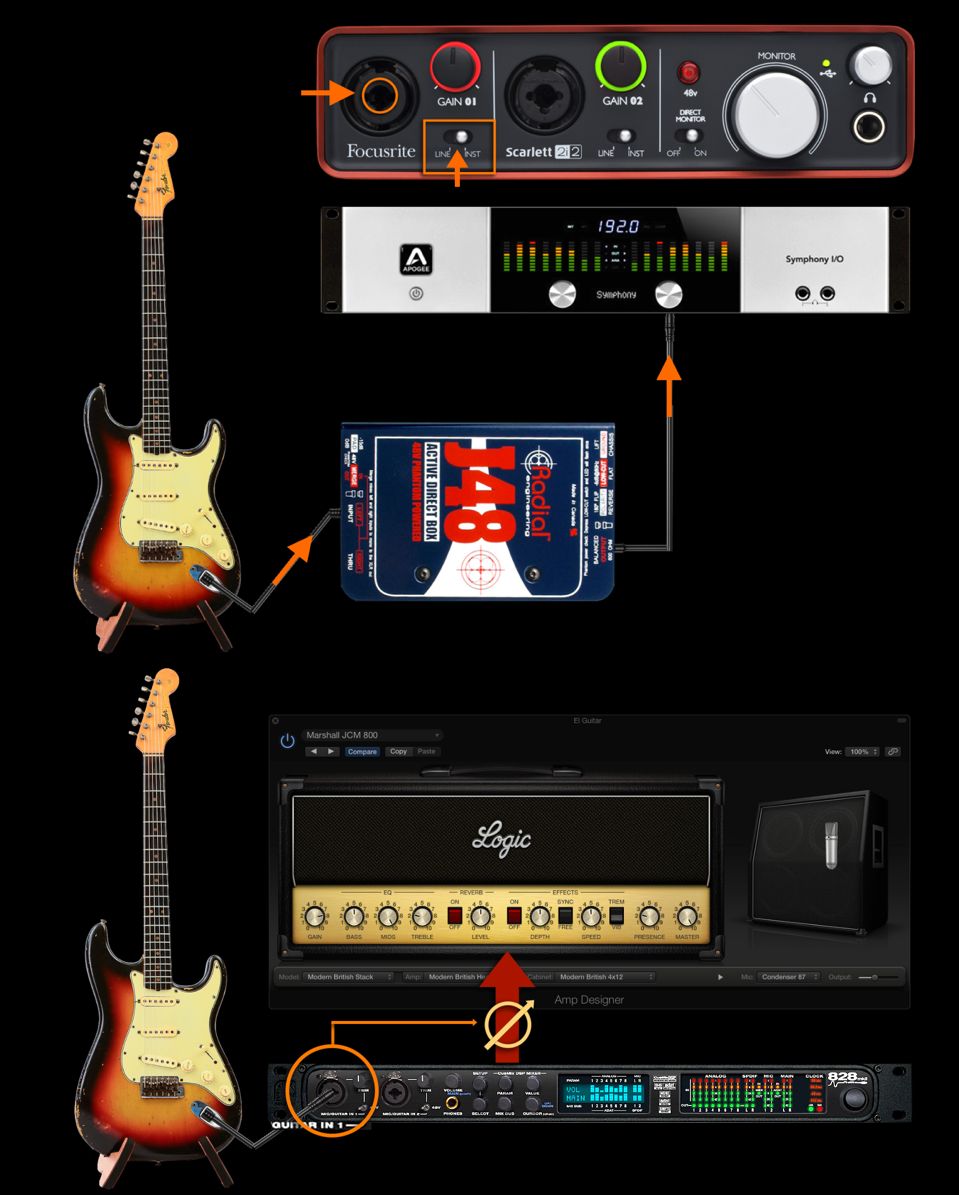
DI—direct injection—is a common way to record electric guitar and bass parts in the modern area. The easy availability of good-sounding amp simulator plug-ins makes it easy to avoid the noise and hassle of miking up a physical amp (which is often not possible in smaller/home studios without noise complaints). Many people simply grab a 1/4” cable, plug into the guitar and any 1/4” hole on the interface, and hit record, but that “little bit of knowledge” can lead to less-than-ideal recordings and mediocre tone.
First off, not all 1/4” jacks are created equal. An electric guitar or bass outputs a very low level signal and requires a very high (≥1MegaOhm) input impedance, and plugging it into a standard line-level 1/4” jack will usually result in weak, thin tone even before the signal hits the virtual amp. An “instrument input” is what’s needed—fortunately most interfaces have at least one, you just have to be sure to find it, or to throw the switch that turns a dual-purpose 1/4” jack into a proper instrument input. Alternatively, an external direct box designed specifically as an instrument input can be used between the guitar and and regular line level input.
The other thing to look out for is level calibration. Most virtual amp plug-ins are designed to provide the same tone and overdrive as real amps, but for the amp sim’s Gain knob to have the appropriate range of tone and crunch, the level of the incoming DI’d guitar signal mast be calibrated to the level the virtual amp is expecting. As long as the recordist is aware of it, this is easily done—the amp sim’s documentation probably recommends a maximum level for incoming guitar signals, which can be set either from the interface’s front panel (instrument input level knob) or by inserting a gain/trim plug-in ahead of the virtual amp. This simple step will go a long way in assuring that plug-in amps that emulate specific real amps actually provide the expected range of tone and overdrive, making it much easier to dial up the perfect guitar sound.
Last Word
Most tasks in recording—even fairly basic ones—turn out to have an extra layer of complexity, and becoming aware of the additional issues is important to getting the best possible results at just about every stage of the production process. It’s always worth taking a little time to dig deeper—your recordings and mixes (not to mention any clients!) will thank you for it.

Discussion
Want to join the discussion?
Create an account or login to get started!