Master Volume
Now that we have completed the main structure of the synth, one last thing I would like to add is a master volume control. As we have seen previously, adding a control for any signal is just a matter of multiplying it with numbers within a range of 0 to 1. When the signal is multiplied by 0 the result is 0 hence the signal is disabled, when the signal is multiplied by 1 the signal is unaffected and results in the signal passing through as is. Any values in between 0 and 1 will result in attenuation of the signal. Let’s set this up!
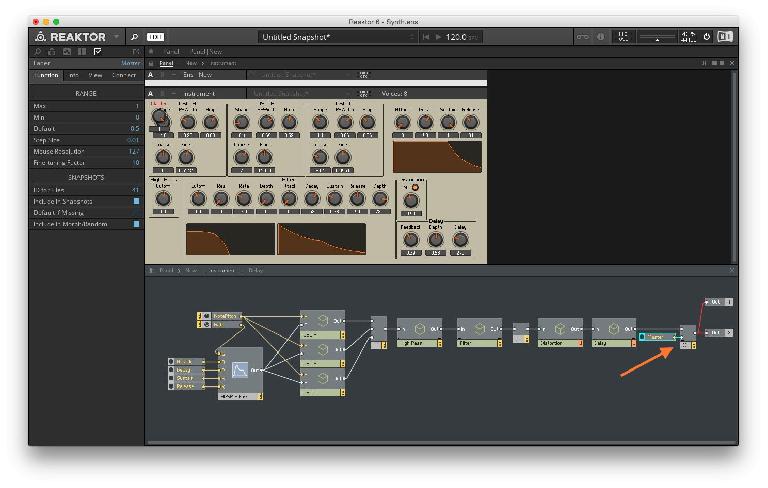
Disconnect the output of the Delay macro from the main Out modules. Hit enter to open the search box and type in Multiply. Hit enter again to load this module. Connect the output from the Delay macro to the top input of the Multiply module. Right-click on the second input of the Multiply module and select Create Control. Double-click the name of this newly created knob and rename it to Master.
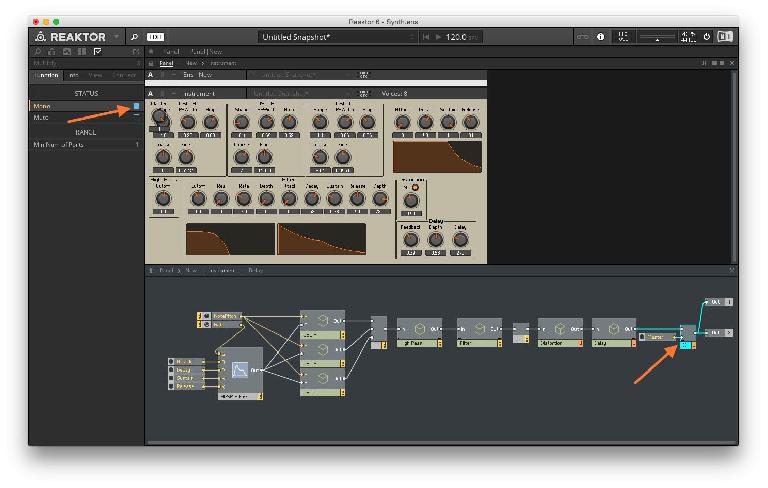
You will notice the patch cables from the output of the Multiply module is red. This is because the Multiply module is polyphonic while the signal its i receiving is monophonic. Select the Multiply object and open the Properties tab. Under Function, set the STATUS to Mono.
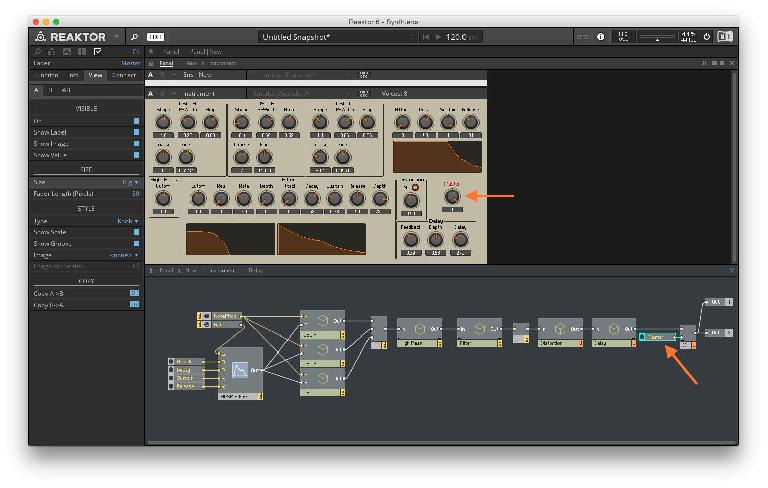
Now playing the synth should produce sound again. Lastly, the panel view needs to be addressed. Hit Command-E to unlock the panel and move the Master dial next to the Distortion macro. Lock the panel by hitting Command-E again.
Graphical User Interface (GUI)
Now that we have created the guts of the synth, let’s address some of the visual aspects of it. There are some options to change the appearance of controls in Reaktor.
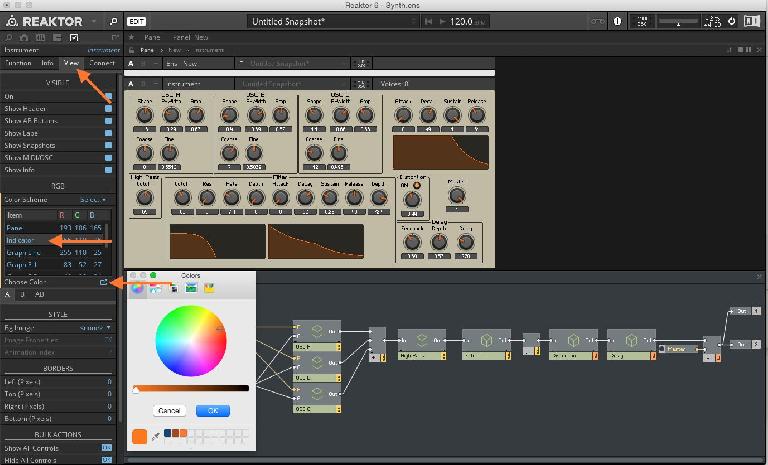
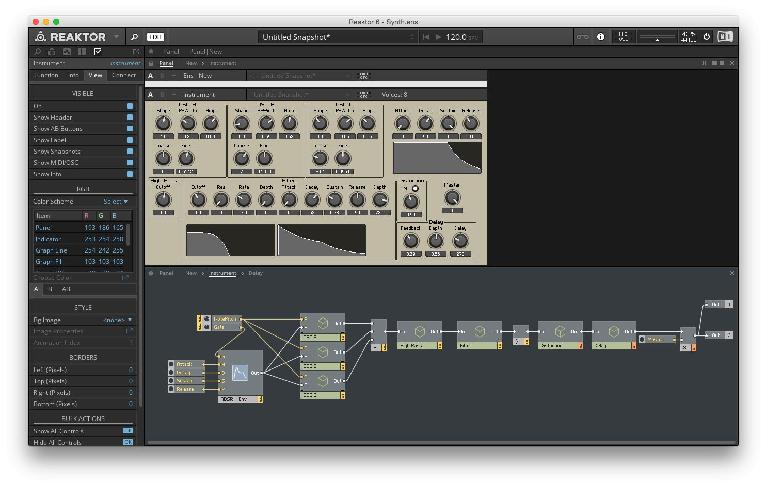
Click in the background of the structure view so nothing is selected. Now go to the Properties tab and open the View subtab. Under the RGB section, you have all the available items that can be changed in color. Select the Indicator text and click on Choose Color below. A color wheel will open up giving you opens to set the color.
Feel free to change any of the GUI element colors. I went for a slightly more greyscale look than the default.
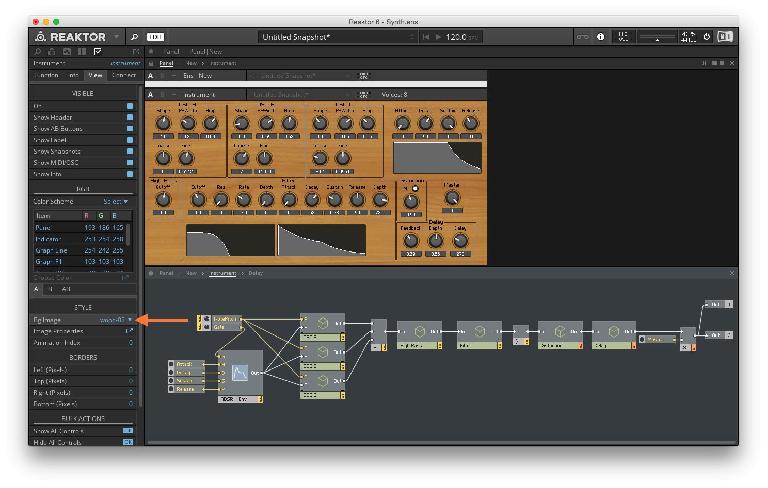
Other than using color variations, you can even have a custom background image for the panel.
In the same View tab, under STYLE, there is a Bg Image option. Here you can load in any .PNG file as a background image. I went for a wood texture background.
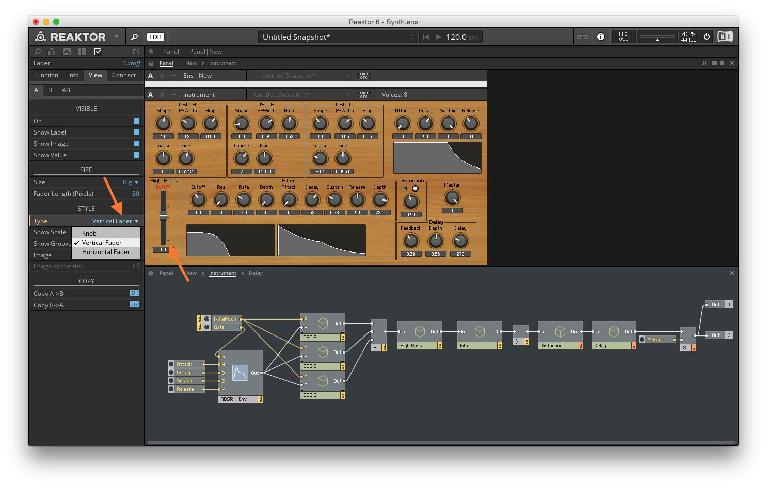
One last thing I would like to address is the High Pass filter’s cutoff dial. I would prefer it to be a slider. Specifically a vertical slider. Just so it fills up the synth panel better.
Select the Cutoff dial in the High Pass macro. As long as the view tab is still open, under STYLE there is a Type option. Set it to Vertical Fader.
Now the High Pass macro takes up more of the panel space and looks much better. Feel free to play around with all the view options here and make changes as it seems fit. Most of the view options don’t affect functionality so it won’t break the synth. You could end up disabling the visibility of a knob/slider as there is such an option and will make it difficult to use as the control as it’s hidden. I would not recommend that, but you can choose to hide the values which would make the layout similar to Native Instrument’s Massive.


 © 2024 Ask.Audio
A NonLinear Educating Company
Discussion
Want to join the discussion?
Create an account or login to get started!