Let’s build a synth in Reaktor!
Initial Steps
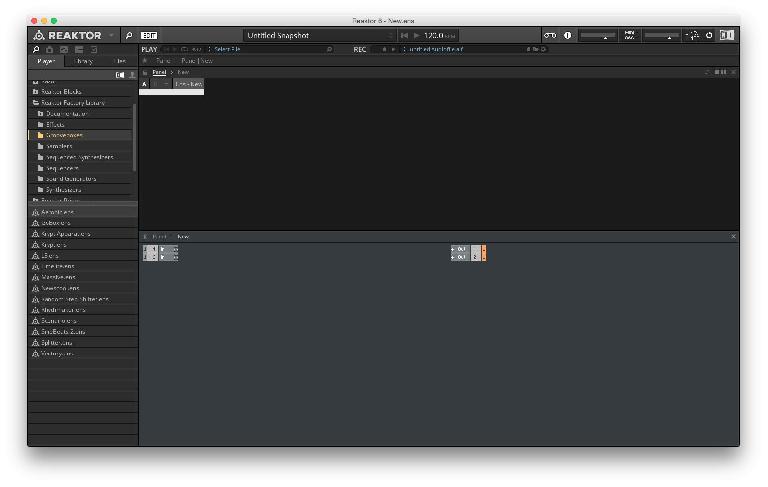
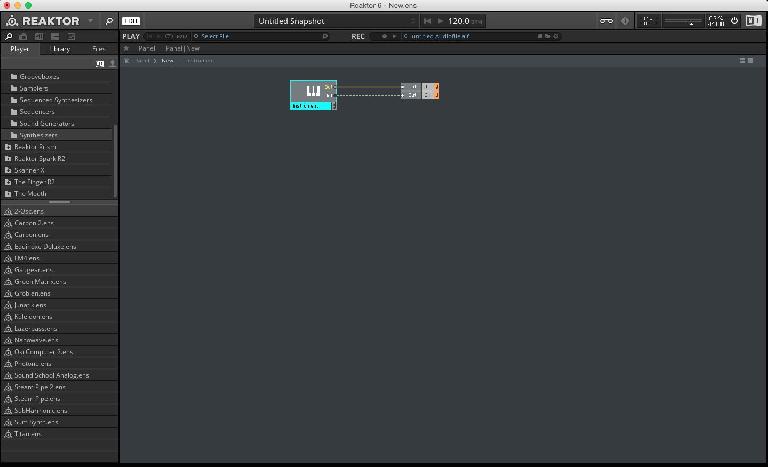
Open Reaktor in standalone mode. Go to File > New Ensemble. You should see an empty ensemble with 2 In modules and 2 Out modules (Pic 1). We will not be using the inputs, as all the tones will be generated internally so go ahead and delete the inputs. To delete the input modules just select the modules and hit the delete key. (Note:Selected modules will be highlighted blue).
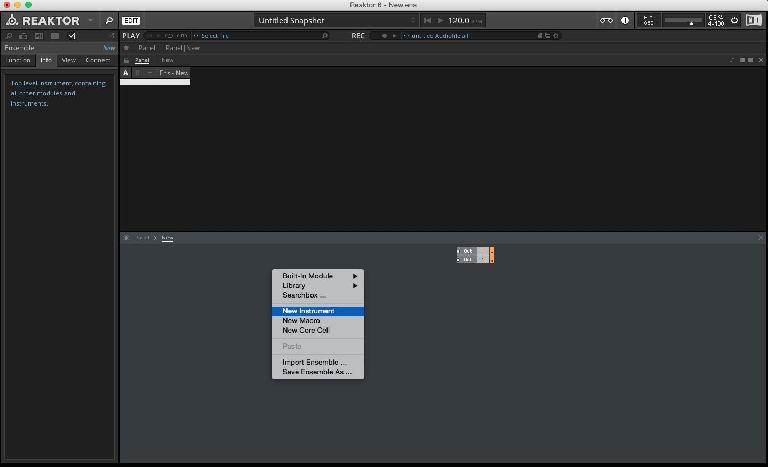
Right-click anywhere in the structure area and select New Instrument (Pic 2). A new instrument module will be created. Inside this instrument is where we will be doing most of the synth building. Double-Click on the instrument module to go inside its structure. (Note:Double-Click anywhere in the grey background to go back one step in the structure). The instrument is completely blank but we will populate it will all the parts of the synthesizer as we move forward in this tutorial.
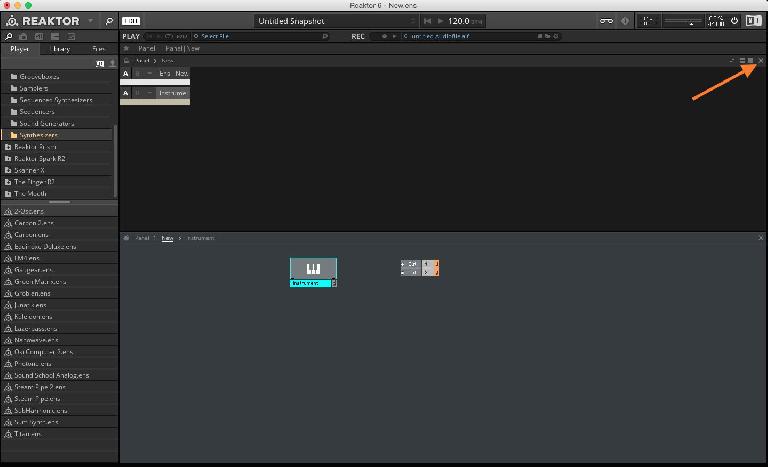
Right now we are looking at the panel view as well as the structure view of the synth. As we will be focusing on the structure view, let’s close out the panel view by hitting the little X in the top right corner (Pic 3). Now we just see the structure view.
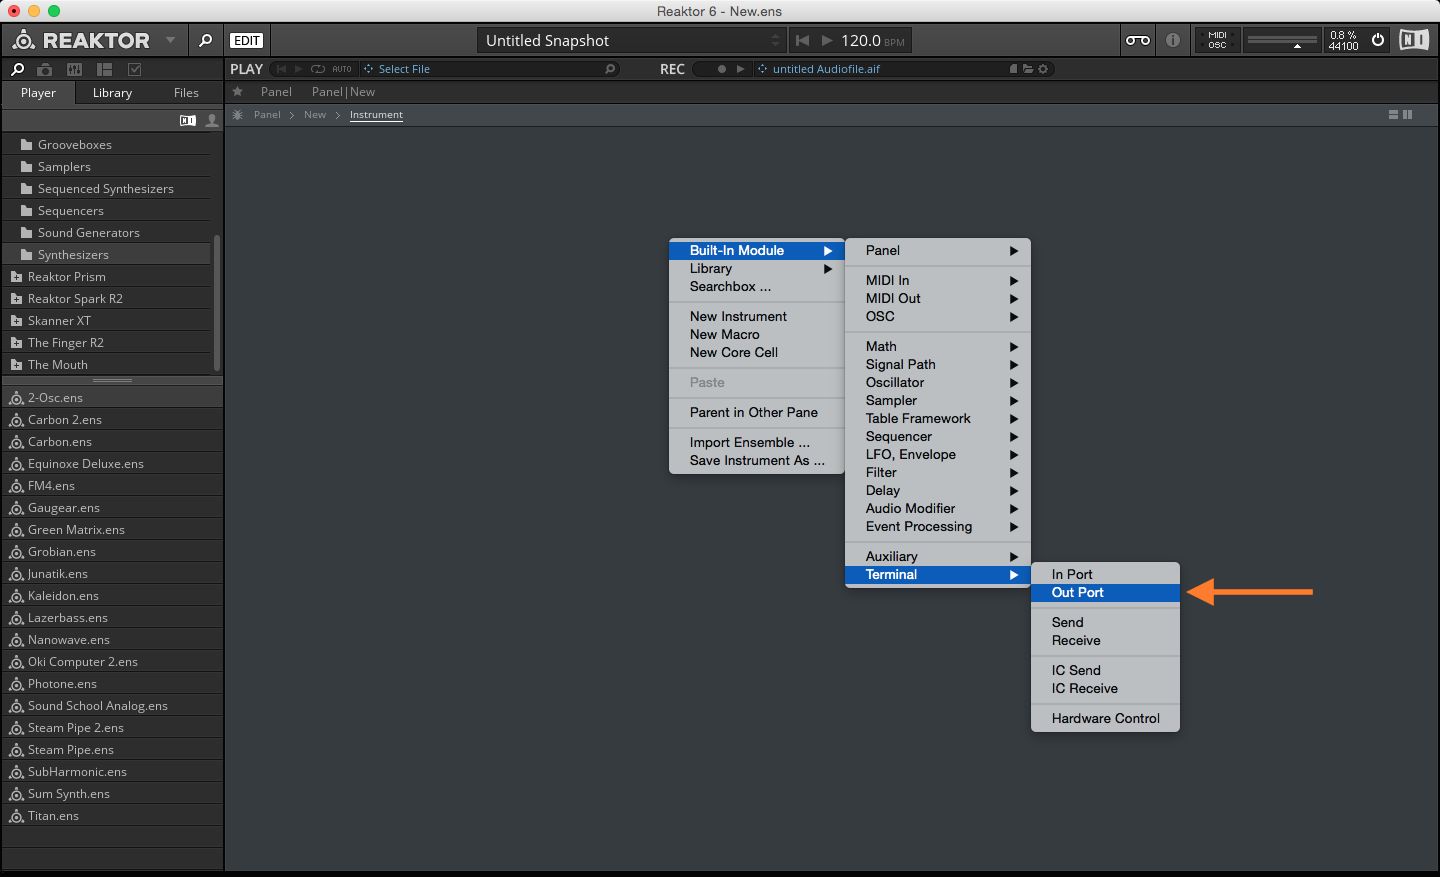
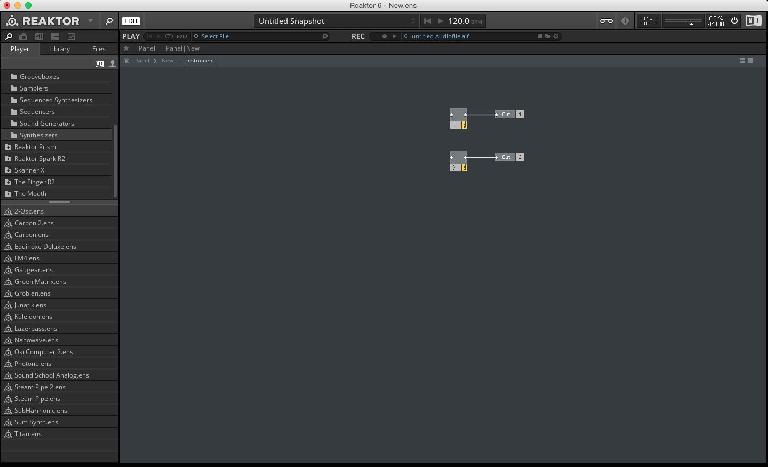
Going back one step in the structure view, you will notice that the instrument module we created has no outputs to connect to the output modules. Let’s address this by adding two Out ports. Make sure you are back inside the structure of the instrument module. Right-Click anywhere in the background and select Built-In Module > Terminal > Out Port (Pic 4). Do this twice so there are two of these modules. (Note:Selecting a module and hitting Command-D will duplicate the selected module.)
If you go back one step in the structure (double-click in the background), now there are two out ports on the instrument which we can now connect to the main outputs. Click and drag from one out port on the instrument to one of the main output modules. A virtual cable will be created to show this connection. Do the same for the second output. (Pic 5)
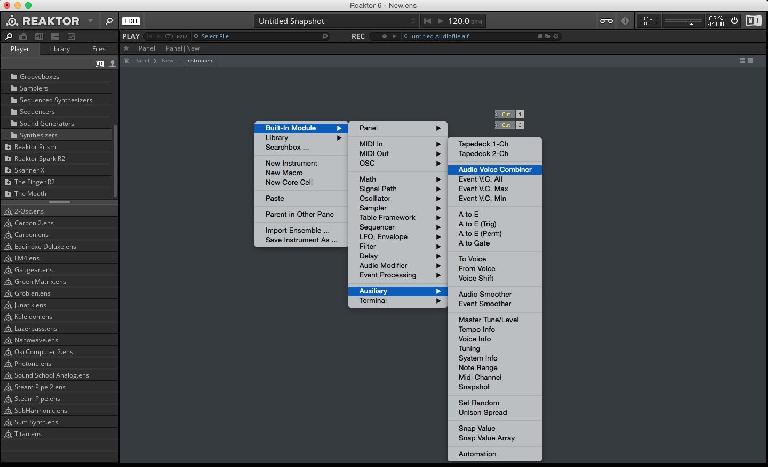
Before we start building the main components of this synthesizer, we need to add in one more important module. Go back into the instrument structure (Double-click on the instrument), right-click in the background and select Built-In Module > Auxiliary > Audio Voice Combiner (Pic 6).
Connect its output to one of the Out port modules. Add another audio voice combiner and connect it to the other out port. (Pic 7) This module is very important as it sums the output of a polyphonic audio signal to a monophonic one. Without this you will notice excessive distortion on your polyphonic signal. This doesn’t mean that you can’t play chords or play polyphonically. It just means that Reaktor will process the output signal as a whole rather than on a note by note basis.
Now would be a good time to save this ensemble. Go to File > Save Ensemble, give the ensemble an appropriate name & save it.
Oscillators
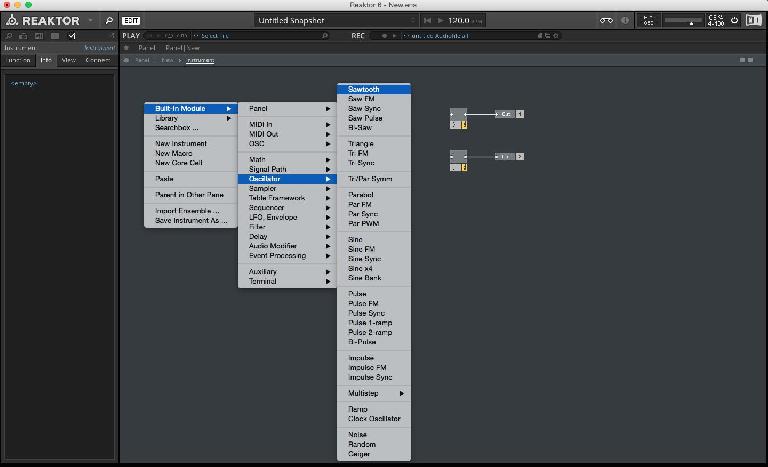
Let's now build the oscillator section. Back in the instrument module structure, Right-Click in the background and select Built-In Module > Oscillator > Sawtooth (Pic 8). In the same menu also load in the Triangle, Pulse & Noise modules. Our oscillator section is going to have 4 of these wave shapes and we will setup a way to smoothly crossfade between the 4.
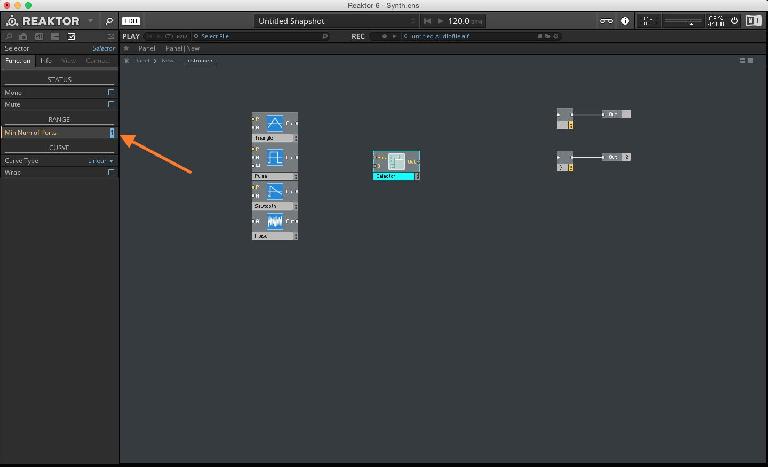
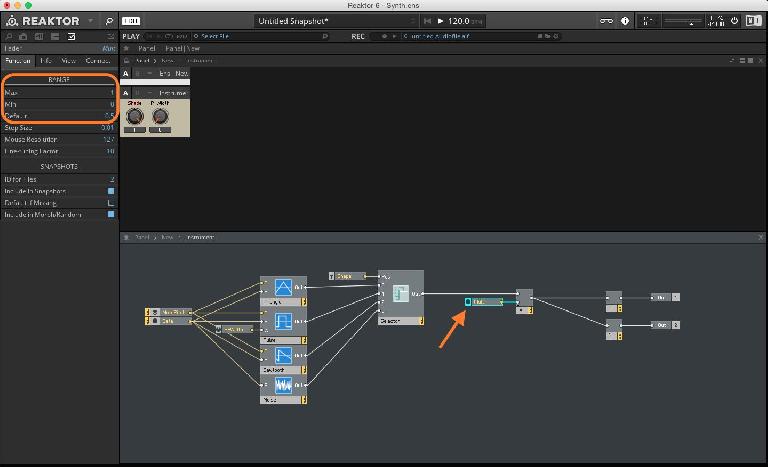
Right-click in the background and select Built-In Module > Signal Path > Selector/Scanner. This module will let us crossfade between multiple signals but right now it only has one audio input labeled ‘0’. We can increase the number of inputs by selecting the objects and in the Properties tab, under the Function tab, there is a Range section which has the option for Min Num of Ports. Change this value to 4 (Pic 9).
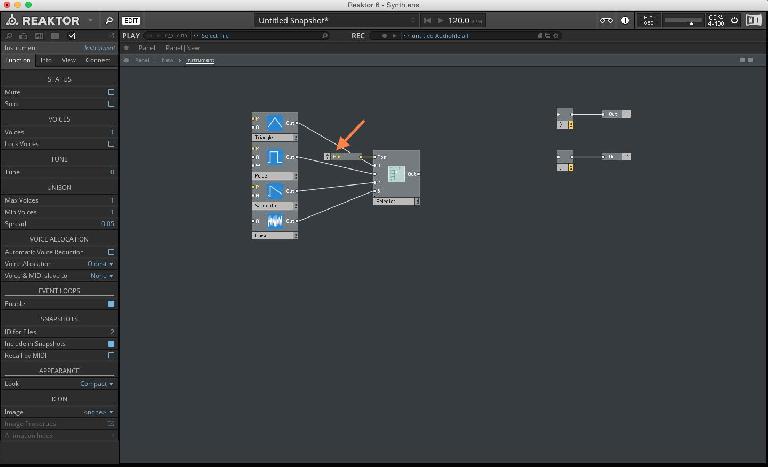
Connect the output from each oscillator (Triangle, Pulse & Noise) to the input of the Selector module starting from input 0. Right-Click on the Pos input and select Create Control. This will create a Fader module that will help us crossfade between the 4 signals (Pic 10).
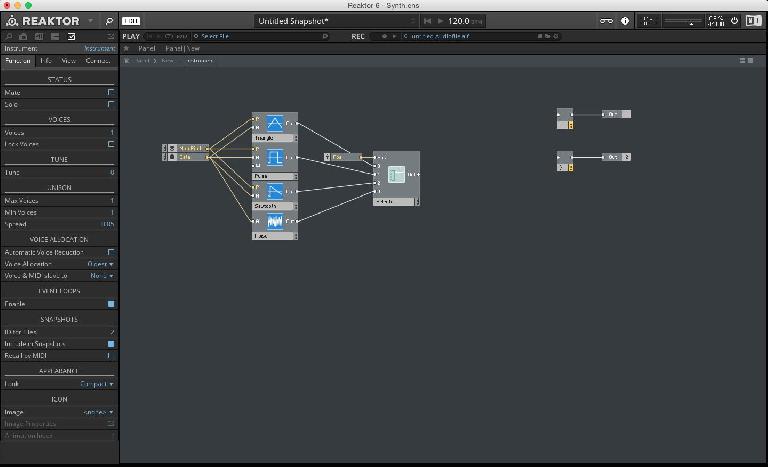
Now we need a way to trigger these oscillators. Right-click in the background and select Built-In Module > MIDI In > Note Pitch as well as Gate. The Note Pitch module listens to the incoming MIDI note messages and routes them to connected modules. Let's connect this to the ‘P’ input of the Triangle, Pulse & Sawtooth modules. (Note: The noise module does not have a ‘P’ input as noise does not have a specific pitch, hence it has no way to control the pitch.) Also connect the Gate module to the ‘A’ input of all the oscillators (Pic 11). The Gate outputs a signal when a note is played. It also detects the velocity of the played notes and sends that data through. This enables velocity control of amplitude.
Just to check if everything is working, let’s connect the Selector to the two Audio Voice Combiner modules that we added earlier. Make sure your headphone/speaker volume is down and play a few notes on your connected MIDI controller. If you don’t hear anything, make sure your MIDI controller’s Status is set to On in the File > Audio & MIDI Settings.
You are probably hearing a Triangle wave shape or whatever oscillator output you connected to the ‘0’ input of the Selector module.
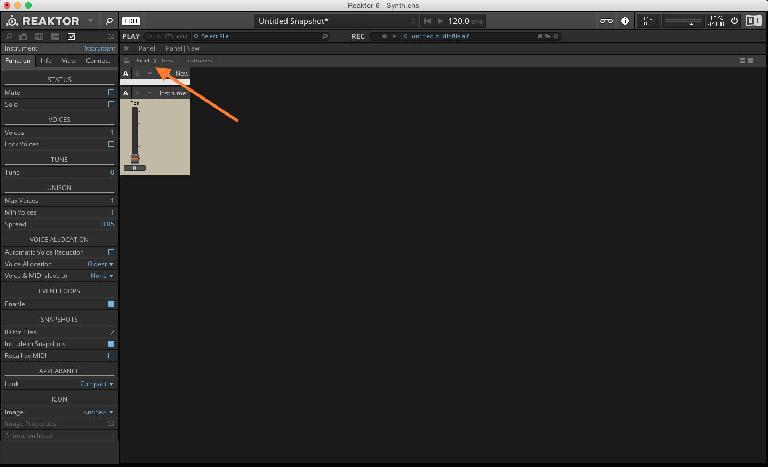
Click on the Panel text in the upper left corner of the structure view to go back to the panel (Pic 12). Here you will see a fader called Pos. This is the fader we created a few steps back. Click and drag on this fader to hear the sound change from one oscillator type to another (Watch your volume!). It would be a good idea to label this Pos fader to something that makes more sense like ‘Shape’. In the structure view, double-click on the ‘Pos’ fader and rename it to Shape.
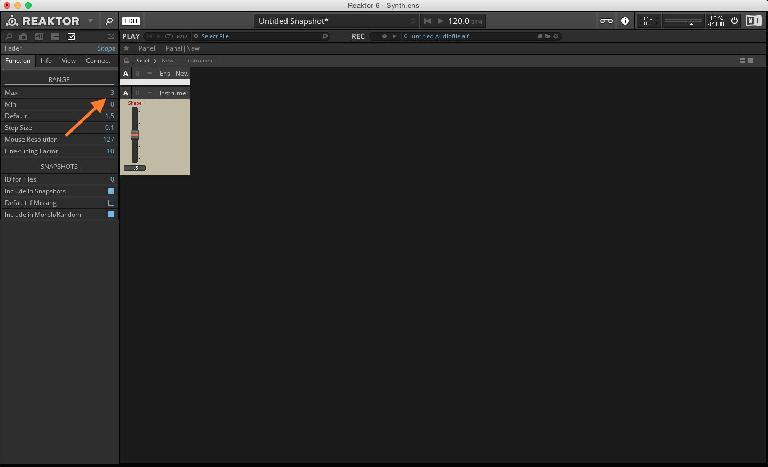
You will notice that the top half of the fader’s range is limited to one of the oscillators. In other words, the four oscillators are not balanced across the range of this fader. To address this, click on the fader to select it, in the Properties tab, under the Function sub-tab, there are values for Minimum & Maximum range. Set the Max to 3 (Pic 13). We do not set it to 4 as we count from 0. Now when you change the fader’s values, you should hear a more balanced distribution of the 4 wave shapes.
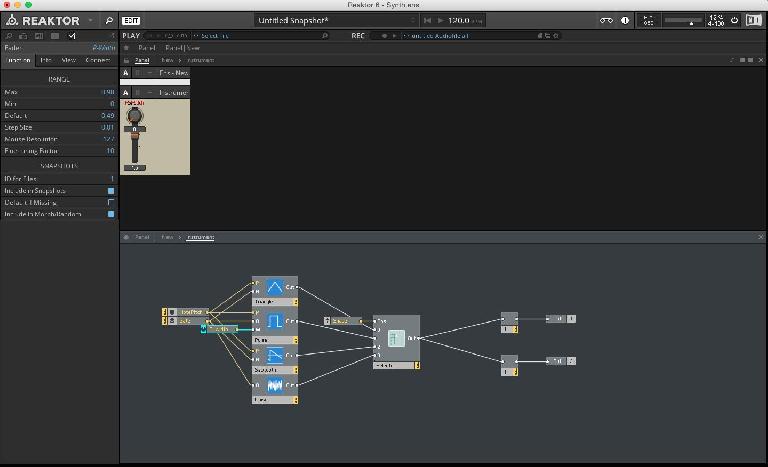
The pulse shape we currently have is fixed to a square but that can be changed by creating a control for the W input on the Pulse module. Right-click on the W input of the Pulse module and select Create Control (Note: Hit F10 to open a horizontal split view of the Panel & Structure). Now we have a fader called P-Width which controls the pulse width for the square shape but in the panel we have a bit of a mess (Pic 14).
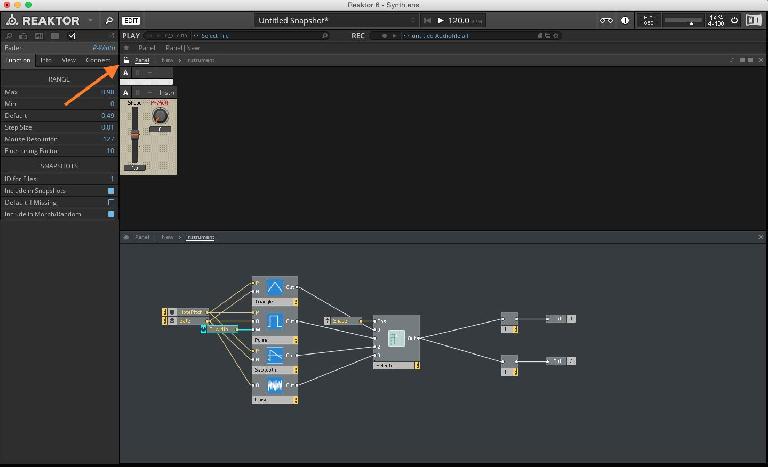
The pulse width dial is placed right on top of the Shape fader. Unfortunately every time you create a GUI element, Reaktor will position it to the top left corner. We can address this by hitting the lock icon or hitting Command-E to enable panel edit mode (Note: You know you are in panel edit mode when the background has a dotted grid). Now you can just click and drag the P-Width dial to a more appropriate location. (Pic 15) Once done, hit the lock icon again to get out of panel edit mode and now you can control the fader and dial.
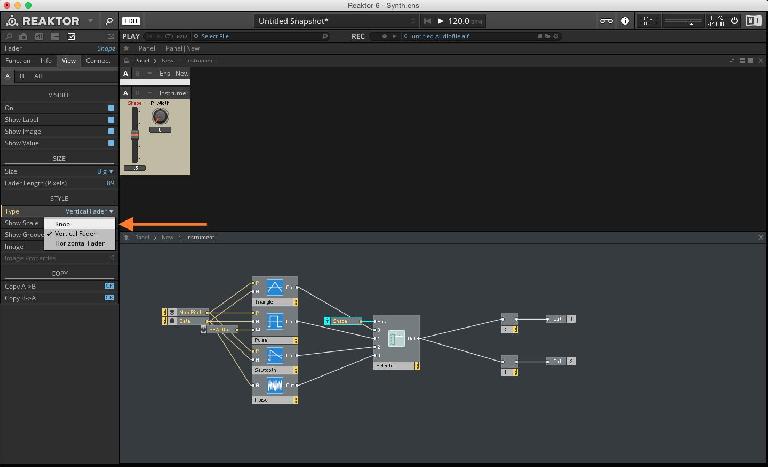
I feel it would be better if both these GUI elements were dials. To change this. Select the Shape fader in the panel or structure view. In the Properties tab, under the View sub-tab you have some options for changing the look of the module. In the STYLE section, under Type select Knob (Pic 16). Now you have a more consistent look.
Let’s now add a gain control for this oscillator section. The quickest way to add a level control to a signal is to multiply it with a slider or knob outputting a range of values from 0 to 1. 0 will make sure the signal is completely turned down, 1 will leave the signal unaffected & anything in-between will attenuate the level. Right-click in the background of the structure view and select Built-In Module > Math > Multiply. As the name suggests this module will multiply two or more signals. Right click on one of the inputs to this Multiply module and select Create Control. Reaktor will automatically set the range of this dial to 0 - 1. Now connect the Selector module’s output to the other input on the Multiply module and connect the output of the Multiply module to the input of the two Audio Voice Combiner modules (Pic 17).
If you look back at the Panel view, you will notice that this new knob is again placed in the top left corner of the interface. Just like we did earlier, hit the lock button to enter panel edit mode and move the knob to an appropriate location. Lock the panel and try out the knob. This knob is currently labeled Mult but just like before we can rename it to something more appropriate like Amp. (Note: You can rename modules by selecting it and editing its name in the Properties tab)
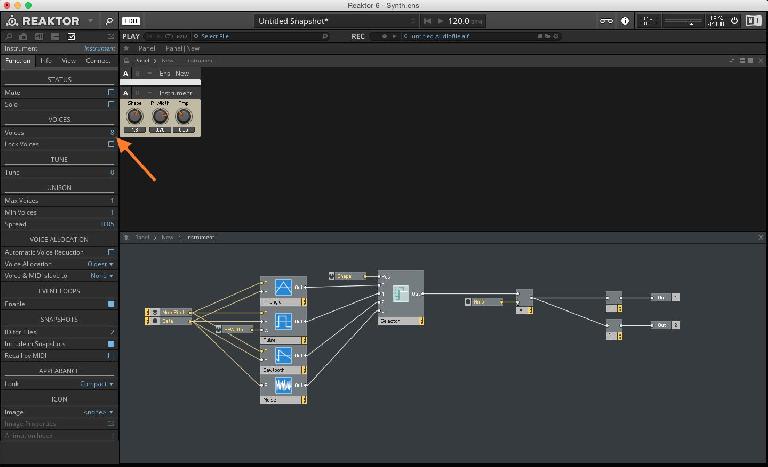
Our synth’s oscillator section is working great so far but it is monophonic, meaning you can only play one note at a time. To make this a polyphonic synth we need to access the global properties of this synth. In the structure view, click once in the background to deselect all modules (Note: You know everything is deselected when the topmost part of the Properties tab says Instrument). Now the Properties tab will show attributes of the entire instrument. Here under Function you have the Voices option. Set that to 8 or any other value you find appropriate (Pic 18). Now you can play more than one note at a time. Keep in mind, too high a voice count will affect CPU usage so try and not to set that value too high.
Don’t forget to save!


 © 2024 Ask.Audio
A NonLinear Educating Company
Discussion
Want to join the discussion?
Create an account or login to get started!