
1. Drag And Drop In MixConsole
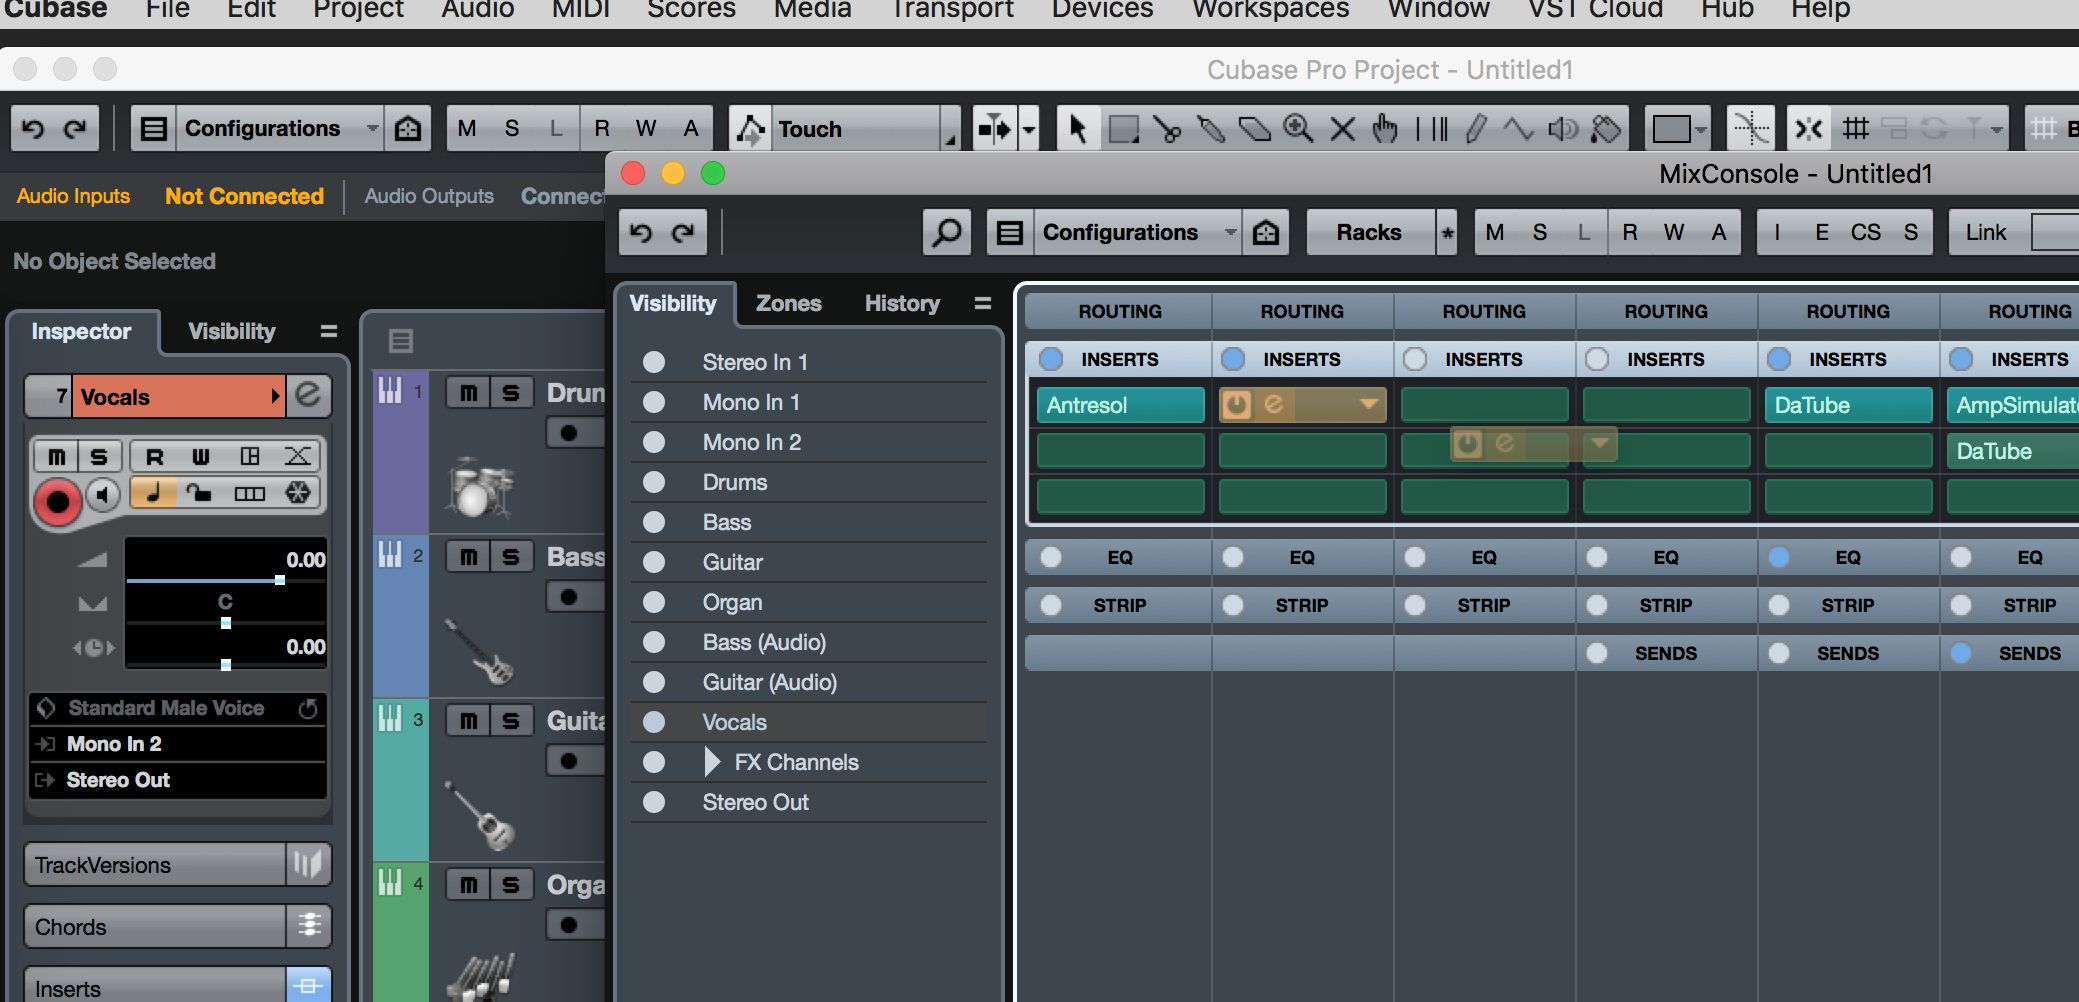
Most people know how to add insert effects to a mixer channel in MixConsole. But did you know that you can pick any effect up from its slot and drag it to any other slot? Or, hold down the alt key while dragging to duplicate the effect to a new slot on any channel. The clever part about this second method is that it copies all the parameters of the effect, not just the effect itself. So let’s say you have spent ages getting a vocal compression set up just right. You could save it as a preset, but you can also quickly duplicate the instace to another channel, taking the setting with you as you go.
2. Use Cubase’s Powerful Track Presets
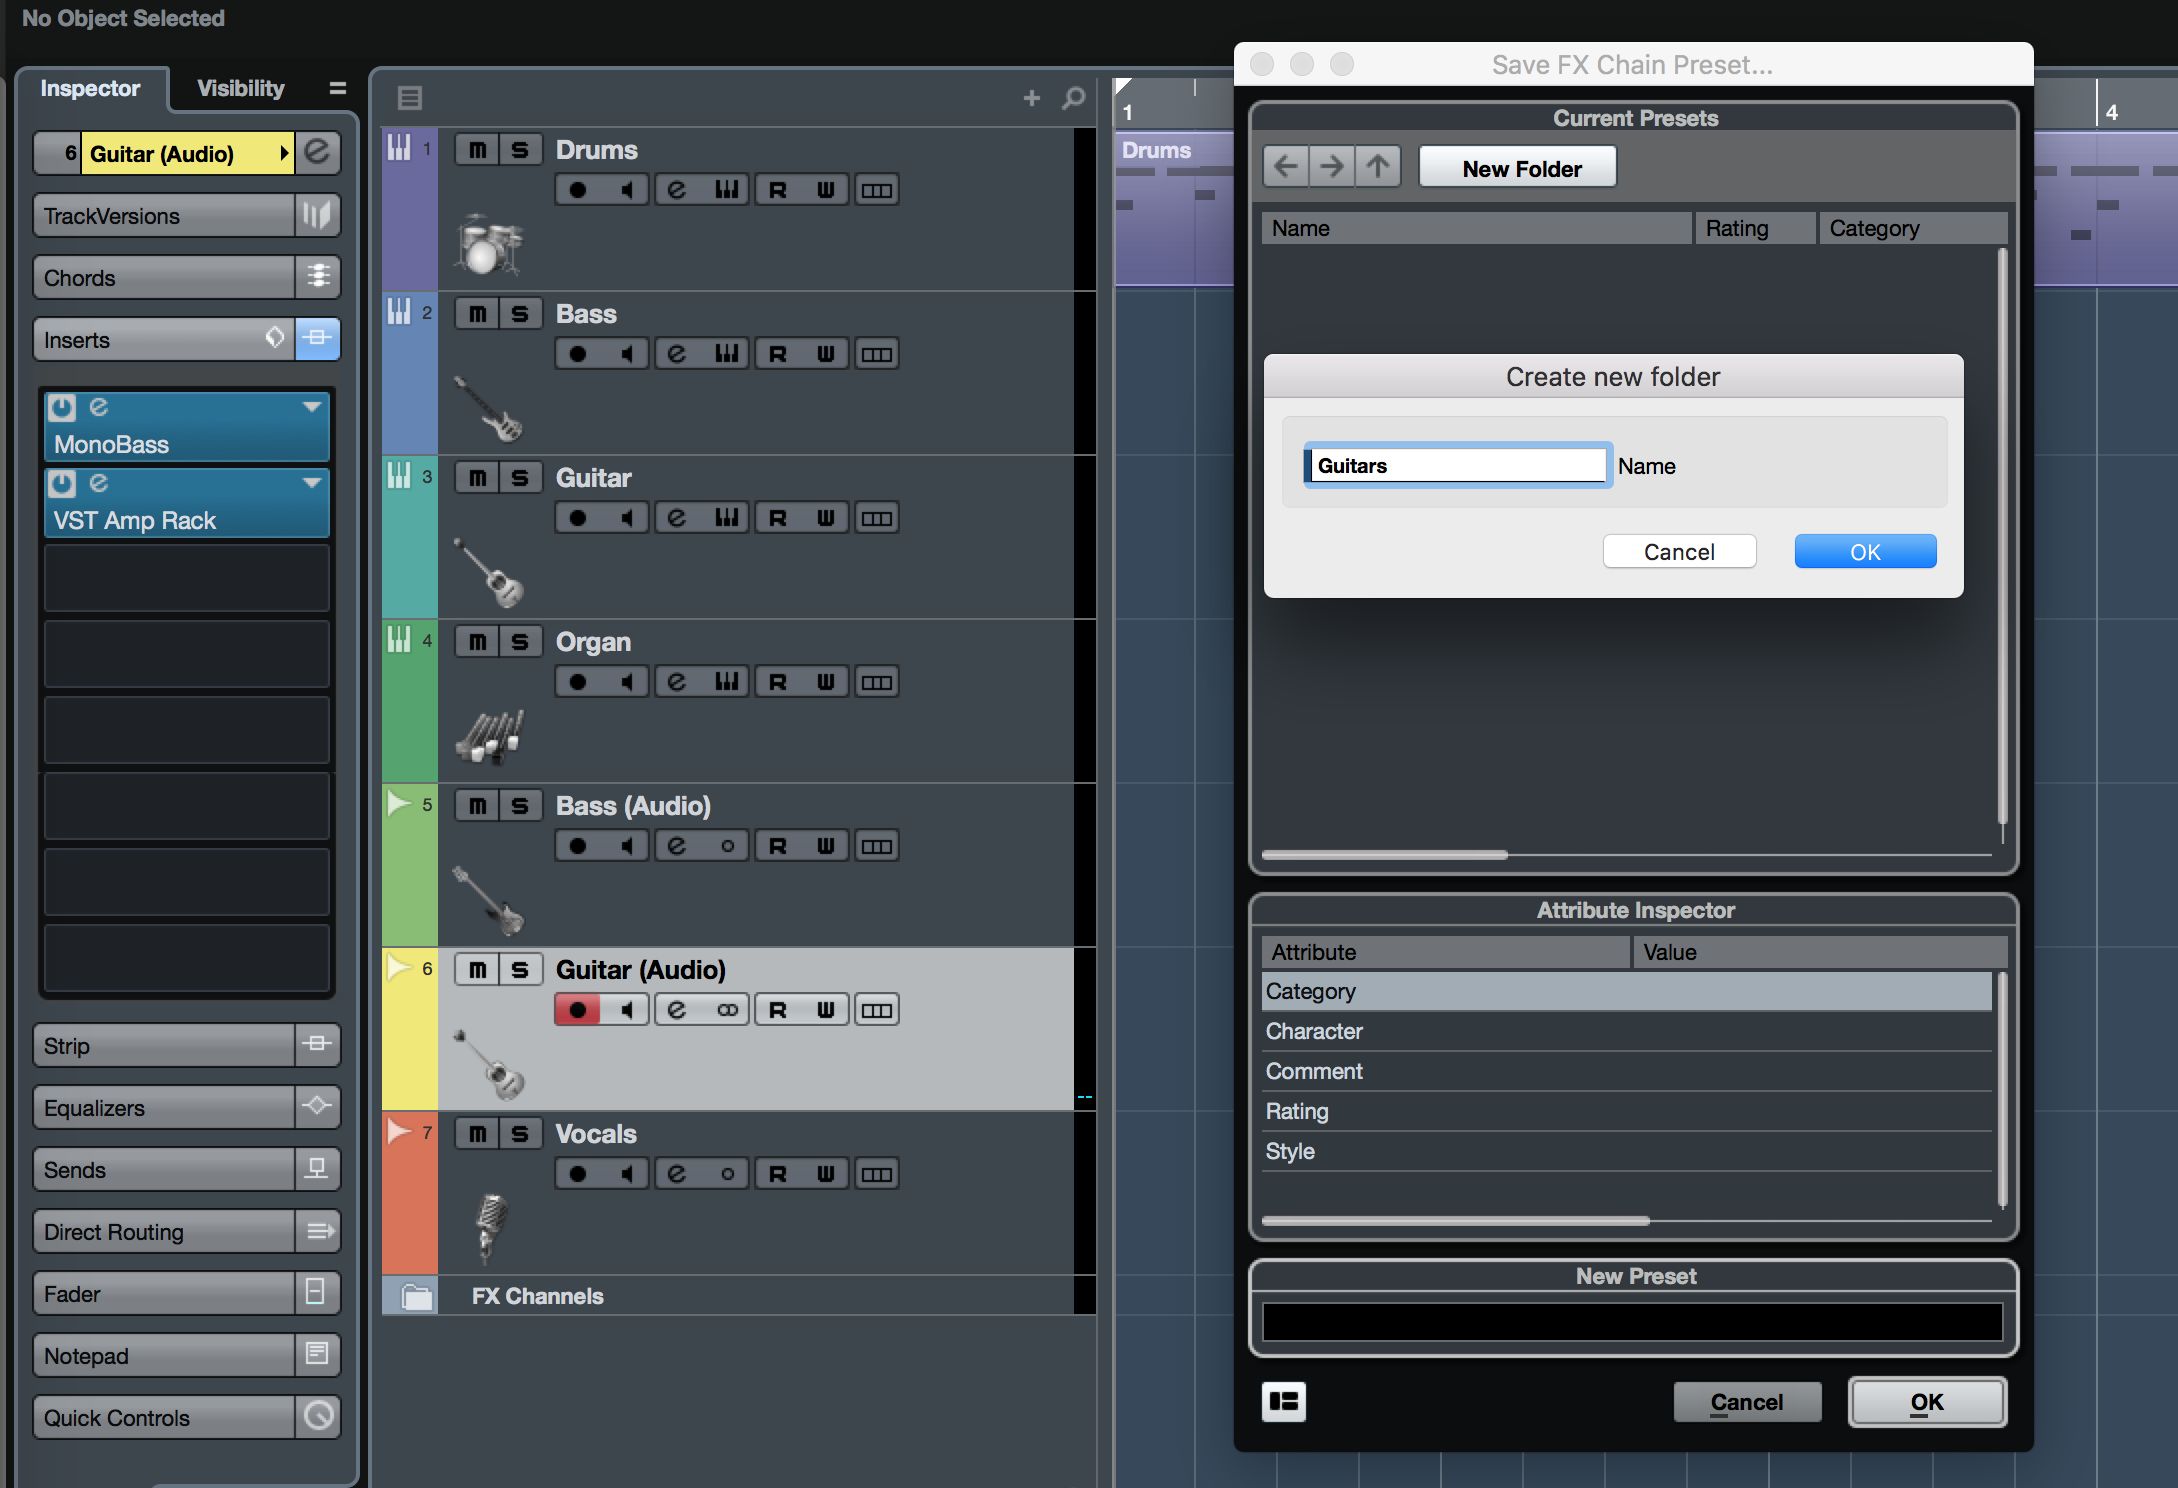
From any insert section either in MixConsole or the Track Inspector for a channel, you can click at the top of the FX list to choose to save (or indeed load) a Track Preset. This is a file that contains data about the plug-ins loaded as well as all their respective settings. In the Save window you actually get a bunch of options that go well beyond simple preset naming. You can add attributes, tags and even create folders to group presets together. Over time this is a good way to build your own library of FX chains for specific purposes, and achieve a signature sound.
3. The Plug-In Manager
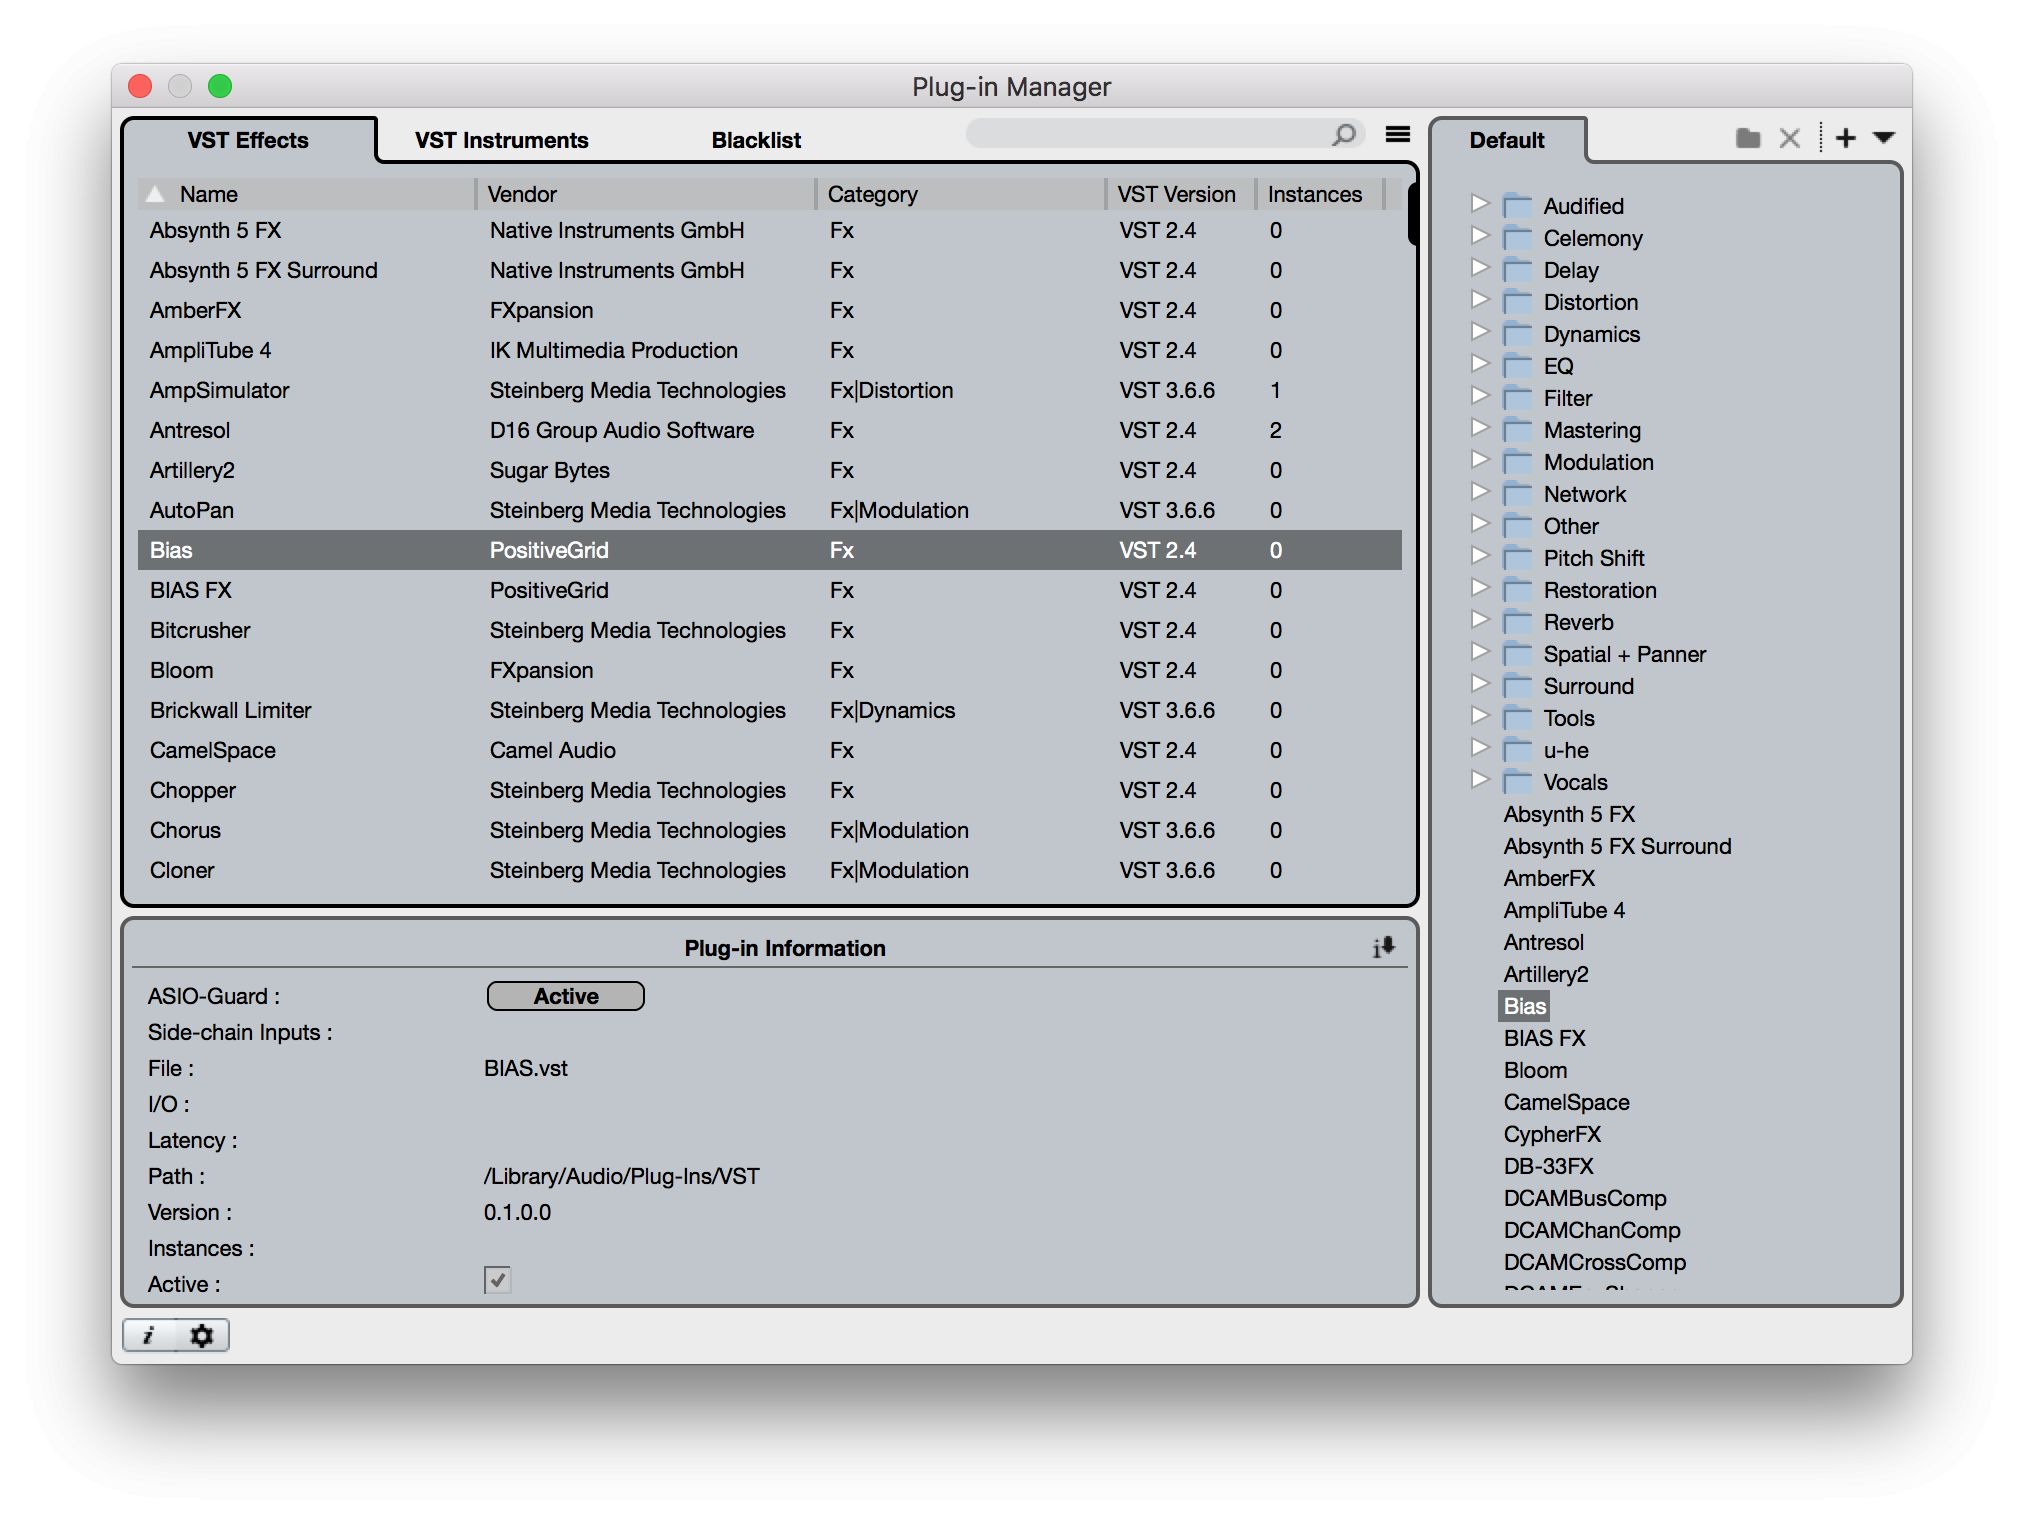
In the Devices menu you will find access to Cubase’s Plug-In Manager, a comprehensive tool for staying on top of your plug-in collection. As well as being able to specify custom VST folder locations you can see which plugs are active, which are in use, blacklisted as problematic and sort the list by type, name, compatibility and so on. From here you can manually deactivate a plug without physically deleting it, and in the Collections list on the right hand side you can create custom folders, perhaps grouping by type, manufacturer or other characteristics. It’s a great way to manage plugs without delving into system-level folders.
4. The VSTi Window
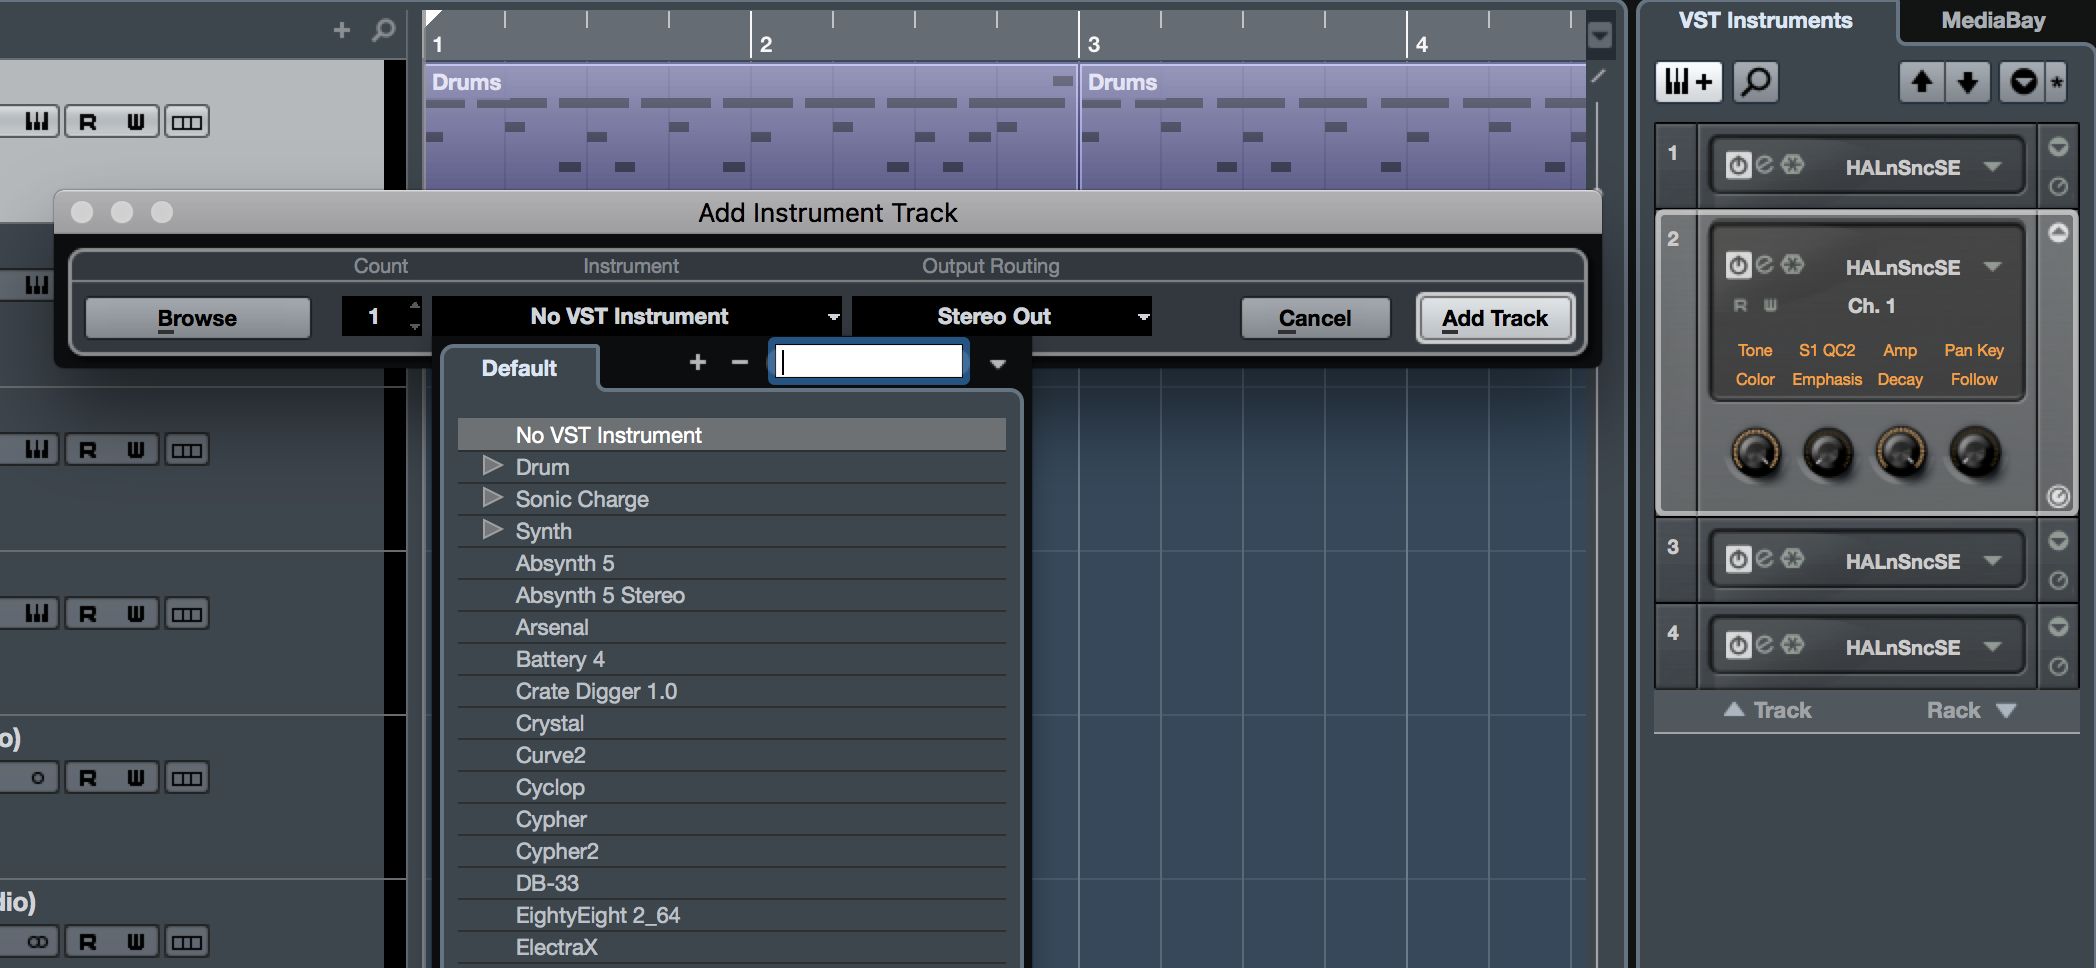
Click on the Show Right Zone button at the top right corner of the Project window to reveal the VST Instrument section. This is a much quicker way of loading and assigning instruments than doing on a per-channel basis. You can search your library and load multiple instruments, assign tracks and MIDI channels to them, use quick controls, open full GUIs and even freeze tracks from here. It’s a powerful tool for managing your virtual instruments inside Cubase.
5. Plug-In Information

Also in the Devices menu can be found a Plug-In Information option. When opened, this provides a simple overview of all the different plugs, codecs and system extensions that Cubase has access to. You can disable or enable these using their checkboxes in cases of troubleshooting, though for the most part you will probably want to leave the system-level stuff alone: there’s a reason it’s there.

Discussion
Want to join the discussion?
Create an account or login to get started!