In any piece of audio software there are always some hidden features or functions that can really turnaround your workflow. I’ve found some of these in FL Studio. They're not huge features, and they're not necessarily shouting out at your face to use them. Some of them are hidden within the menus, but I’d like to show you these gems and how they can help you working in FL Studio.
1. Ghost Channels
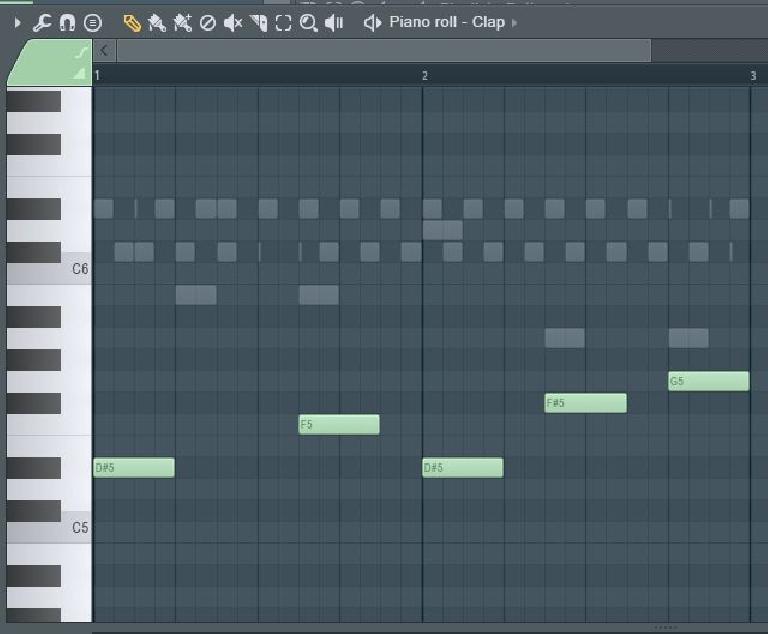
Ghost channels work great when you want to compare MIDI data between two track channels. Let’s say you’ve written in a drum fill and you want to program in a bass part that will follow the timing of this fill, that’s where ghost channels come in real handy.
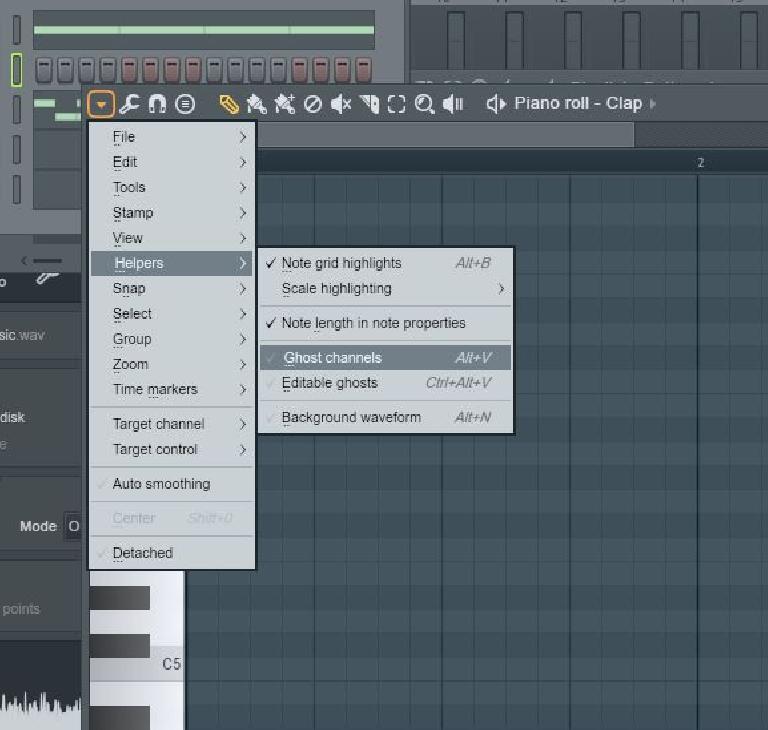
When you’re in the Piano Roll view from the Options menu go to Helpers, and select Ghost Helpers, or use the shortcut Alt-V. So this will show other MIDI data that is on the same track.
Now when I go into my Piano Editor, I can see the ghost notes, and program in a pattern that will be in time with the ghost channels.
2. Waveform Helper
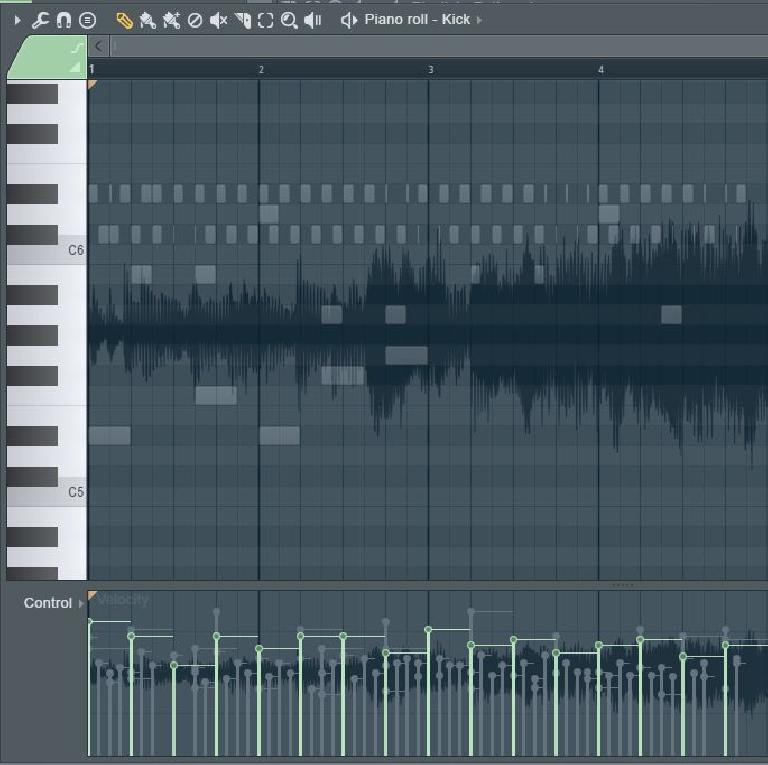
Another helpful view is the Waveform view. What this allows you to do is drag an audio waveform onto the piano roll editor and the waveform will display behind the notes. This can also be found under the Helpers menu, just tick/untick Background Waveform. This is particularly handy if you want to program a synth line to go with an audio clip. Let’s say you recorded a vocal part and you want a synth to follow the vocal melody. Then drag the audio of the vocal onto the piano roll and then you can see the transients of the sound where there’s note changes and you can line up your MIDI programming with the waveform.
3. Dumping your Score
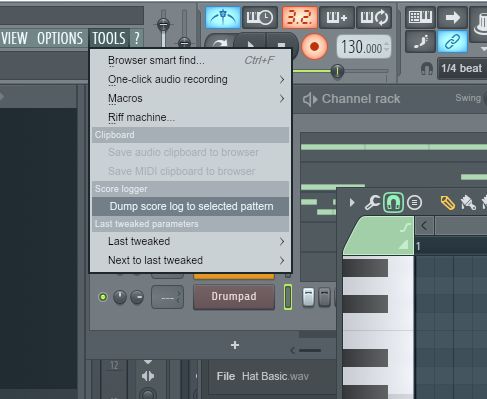
I often find that I write my best MIDI melodies and chord progressions when the red light isn’t on and that’s where the dumping your score log feature is a real life saver. So, FL Studio is always capturing what you’re playing (the incoming MIDI into FL) even if you didn’t hit record, and with this feature you can pull those performances in.
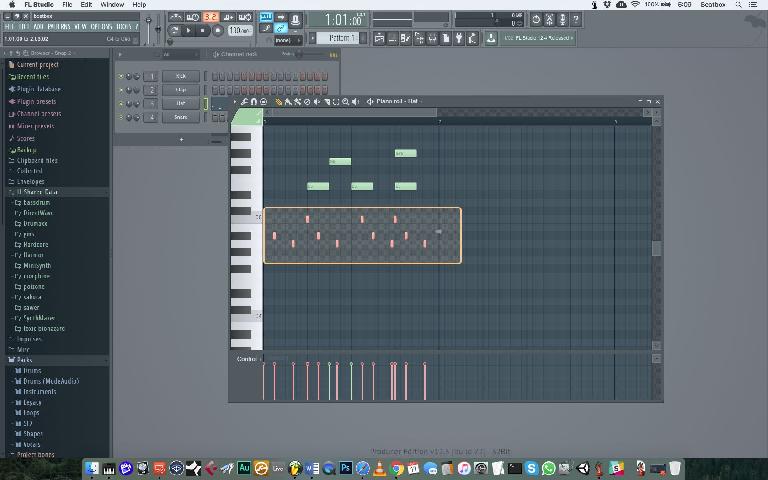
Let’s say you played in a part on your keyboard and forgot to record it. Make sure you’re in a pattern, make an empty pattern if you have to and then select ‘Dump Score Log to Selected Channels’ from the Tools menu. Now you’ll see the MIDI notes that you forgot to record in. Voilà! I love this feature. It has saved me quite a few times.
4. Snapshots
It can be a bit of a drag scrolling through the browser panel to find patches and presets. What really helps with this is the browser Snapshot feature. You can take snapshots of the folders you go in regularly and quickly recall them with a snapshot shortcut. So here’s how it’s done. First choose a snapshot that you want to save to.
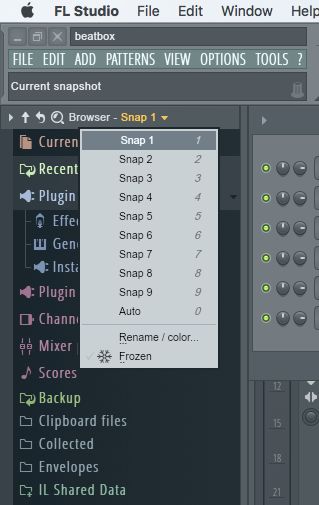
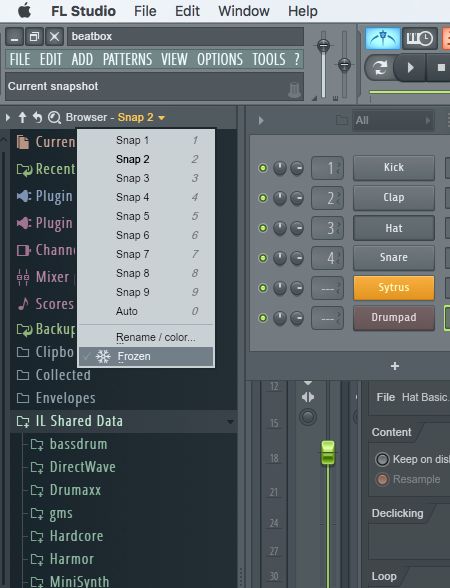
Then navigate to the Browser on the left-hand side, and scroll around and find a folder you access regularly. Maximize it to reveal its contents. Now let’s try another snapshot. Scroll to another folder and reveal its contents. This will be saved to the other snapshot. Now here’s the cool thing, you can use the numbers above the QWERTY layout to recall these snapshots. So press 1, and it recalls your first Browser snapshot, and then press 2 and it recalls the second snapshot. And you can have a maximum of 9 screenshots. This really helps speed up your workflow when browsing through patches and presets. You can even freeze the snapshot so they won’t change.
5. Coloring Notes in the Piano Roll
Did you know that you can color specific notes to different colors in the piano roll? You can assign them to a group and give them a unique color. This is pretty handy. Let’s say you have a drum instrument and you want to color the Hats to a specific color. Now when you look at that MIDI data you can quickly see which notes are hats.
To do this, first select the MIDI notes you want to color
Then select a group color for them
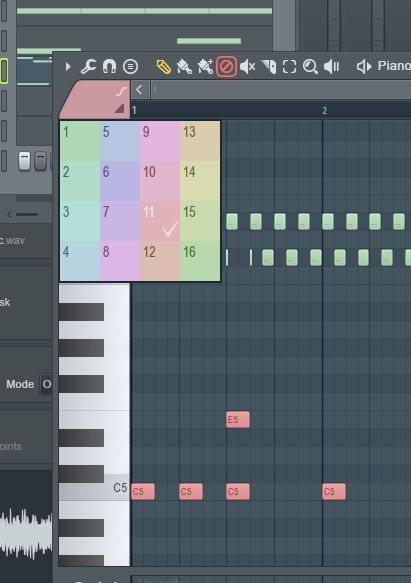
Another benefit of this is that you can choose the color from the color bar, and then press Shift-C and any colors assigned to this color will now be selected.
So, for example you could assign your hats to the color purple. And then if you needed to edit just the hats you could choose their color, press Shift-C and then all the notes are selected them and you could edit them, like maybe moving then to another MIDI note, or shifting them down.
6. Easy Transposition
I often find I need to select some notes and move them either up or down. This is usually a bit of a hack. I first need to select the notes with the select tool, and then I need to jump can to the draw tool and move the notes around to where I want them. But I find you can quickly transpose section with the shortcut Shift-Up/Down. So I can select the notes and instead of jumping to the draw tool I can use this shortcut and easier transpose the notes up or down a semitone. And I just have to do the shortcut again if I want to go further up or down.
7. Handy Piano Roll Shortcuts
This one is probably pretty obvious but I found in the beginning when using the Piano Roll, I’d keep mousing up to the toolbar to choose a different tool. Learn the shortcuts for these, and you’ll cut down the time mousing up to the toolbar, and be more productive with your songs. So here they are, learn them!
- P – Pencil Tool
- B – Paint/Brush Tool
- E – Select Tool
- D – Delete Tool
- T – Mute Tool
- C – Slice Tool
- Z – Zoom tool
Make a little rhyme with them or whatever, but memorize them.
8. Moving tracks Around in the Mixer and Channel Rack
I found in the beginning working with FL, having trouble moving tracks around easily. Here’s a handy tip to help you manage your tracks in the Mixer and Channel Rack. First select the track, then hold down Alt and then you the left and right arrow keys to move the track around the mixer. Similarly, if you want to move a track around in the Channel Rack, hold down Alt, and then use the up and down arrow keys.
9. Zoom Shortcuts
Now when you’re in the Playlist Editor, I found the best way to zoom in and out to focus in on areas is to use the Page Up key to zoom in, and the Page Down key to zoom out. There are other shortcuts and ways for zooming in, but I found this method to work really well and efficiently.
10. Reversing Audio
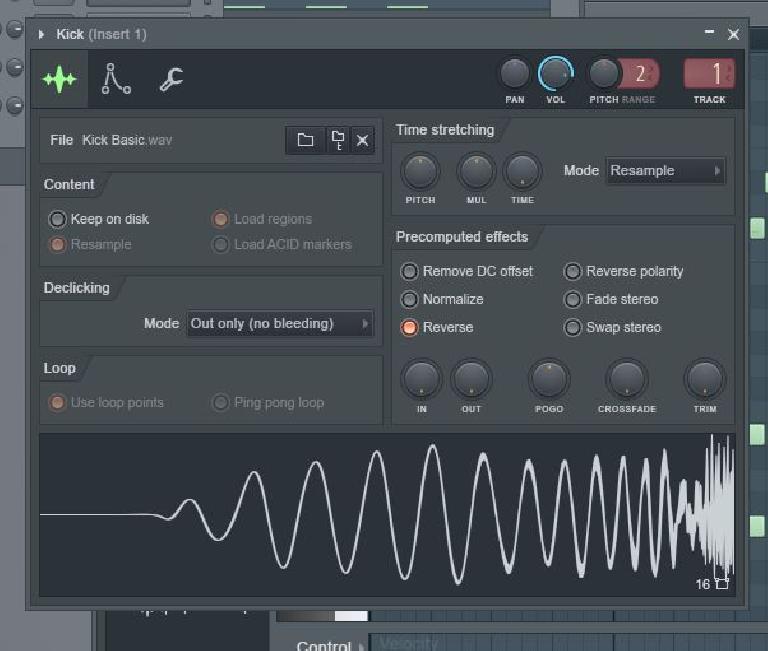
There is a very simple method to reverse an audio snippet in FL Studio. What you can do is drag the audio file onto an empty track in the Channel Rack. This will create a sample instrument for the track. Double-click the track to open its channel setting and then click the Reverse button. You’ll see the waveform change in the view below showing that the audio has been reversed.
This works well when you want to make swells like reverse kicks, snares, and even cymbals.
Conclusion
That’s some useful tips and tricks that I have found while working in FL Studio. Some of them may not be completely hidden but you may have missed them. I know some of the obvious ones took me sometime to figure out. Maybe you’re in the same boat and you want some tricks to help improve the speed and efficiency of working in FL Studio. Try these out in your next FL production.


 © 2024 Ask.Audio
A NonLinear Educating Company
Discussion
Want to join the discussion?
Create an account or login to get started!