Tip 1 - Manage windows efficiently
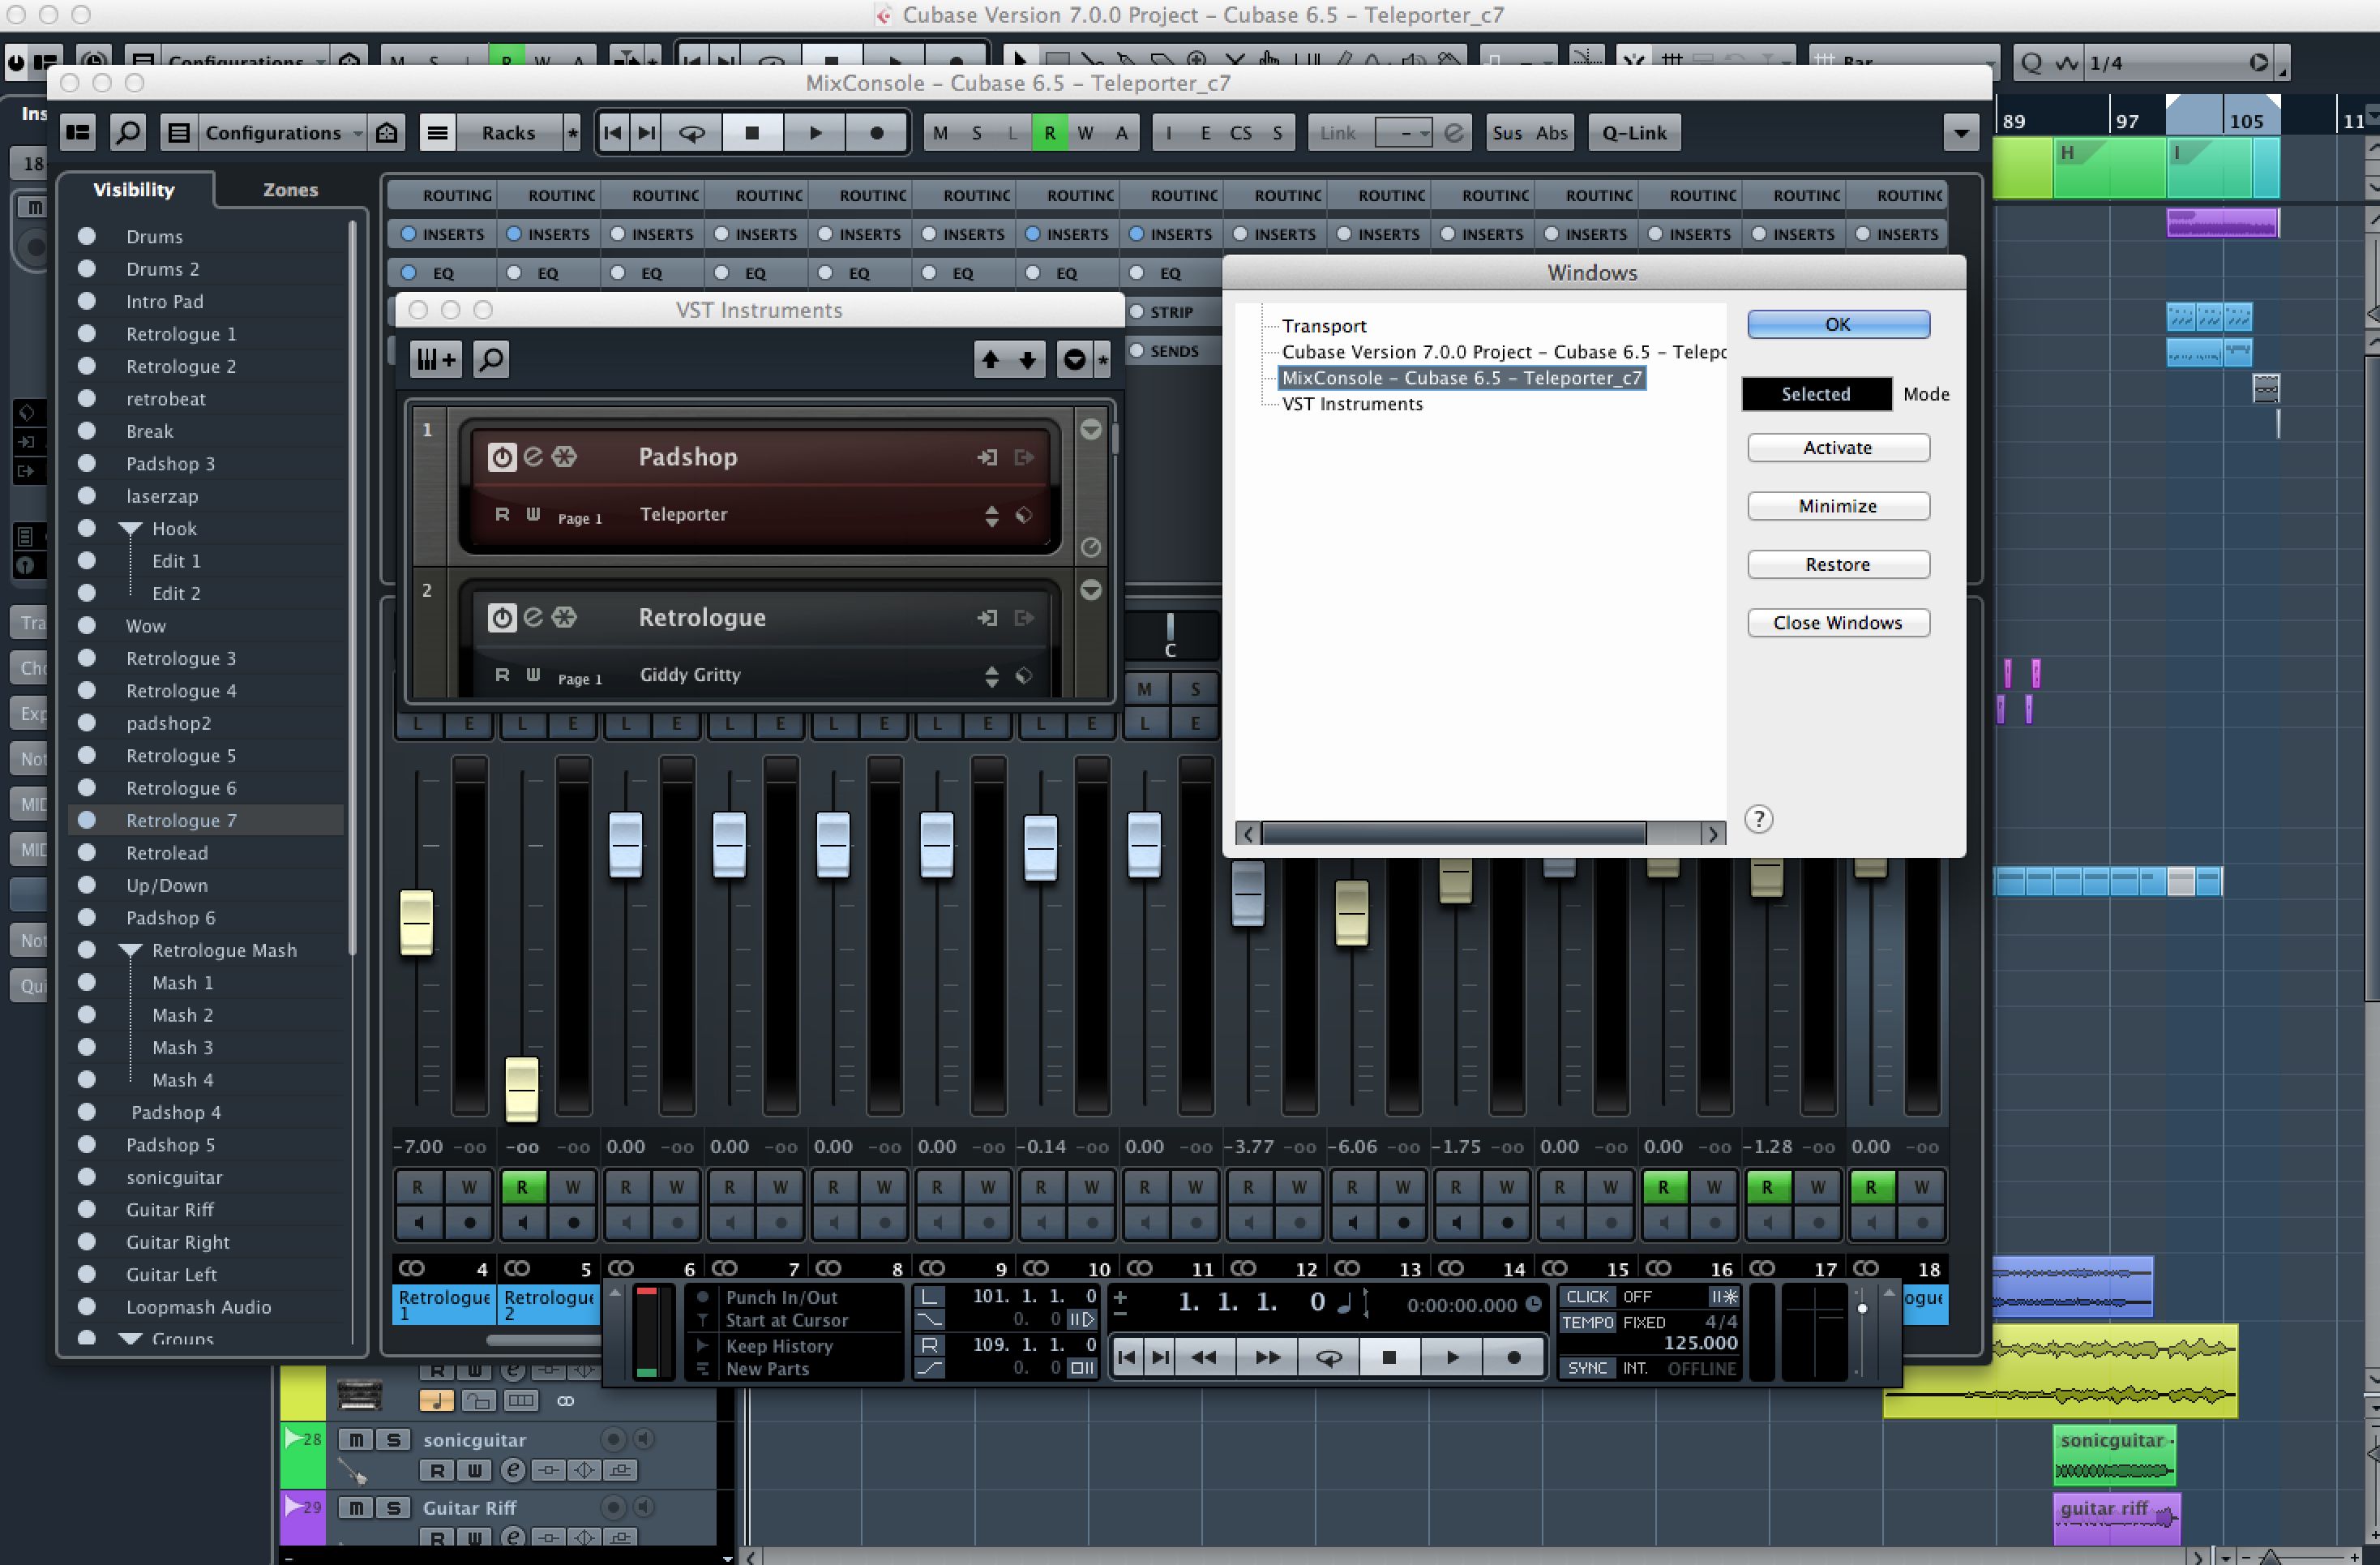
Cubase can do a ton of different things and many of them require opening a separate window, whether it's for the mixer, a VST instrument or one of the many other available sections. You might be lucky enough to have two big monitors but if you haven't, you'll need to get creative with window management. If you go to Window > Workspaces you can save and load different window layouts, say for example to have one for tracking, one for mixing and one for editing instruments. Choose the Windows option from this menu and you get a floating palette from which you can instantly activate, minimize, close or restore any active window in a project without having to manually locate it with the mouse first.
Tip 2 - Get more from the VST Instruments window
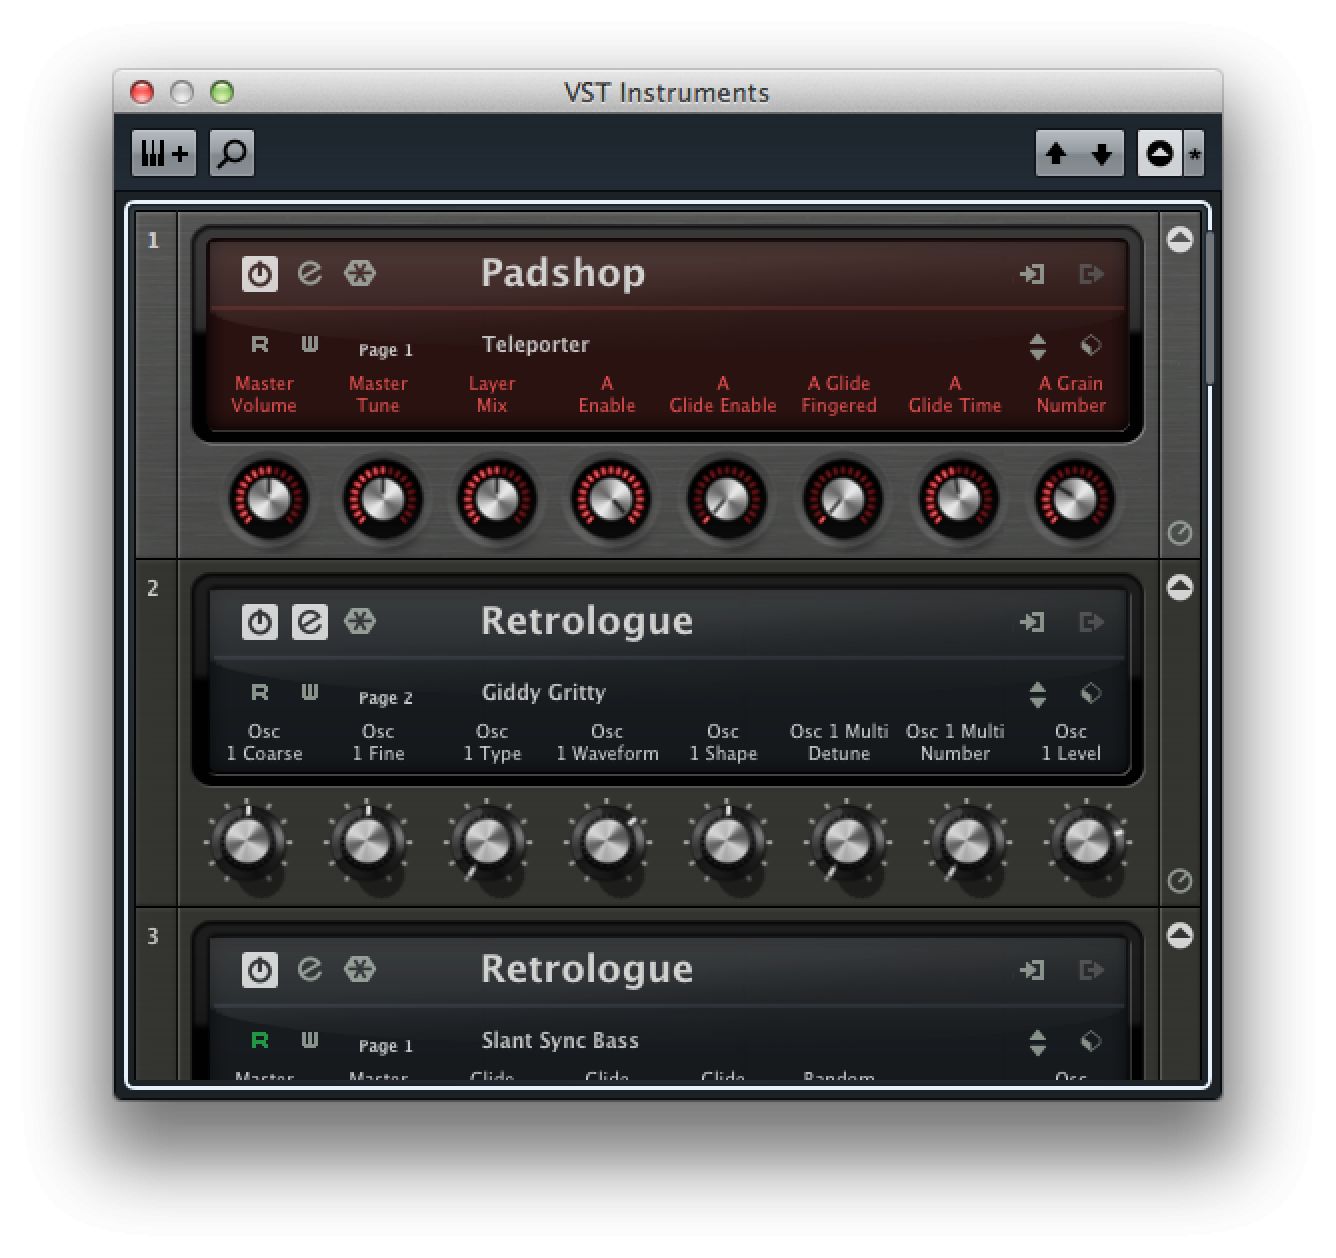
In Cubase 7.5, the VST Instruments window is really powerful and allows you access to a stack of shortcuts that can really save you time. As well as being able to display quick controls for any given instrument, it lets you instantly freeze any instrument or open its GUI, solo or mute its input and it has a search field to let you quickly find the instrument you want, however many are loaded. Instruments can be quickly swapped out by clicking on their name and presets loaded by clicking on the preset name field. You'll also notice that Track and Rack instruments are displayed in separate sections for easier navigation.
Tip 3 - Take advantage of Track Versions
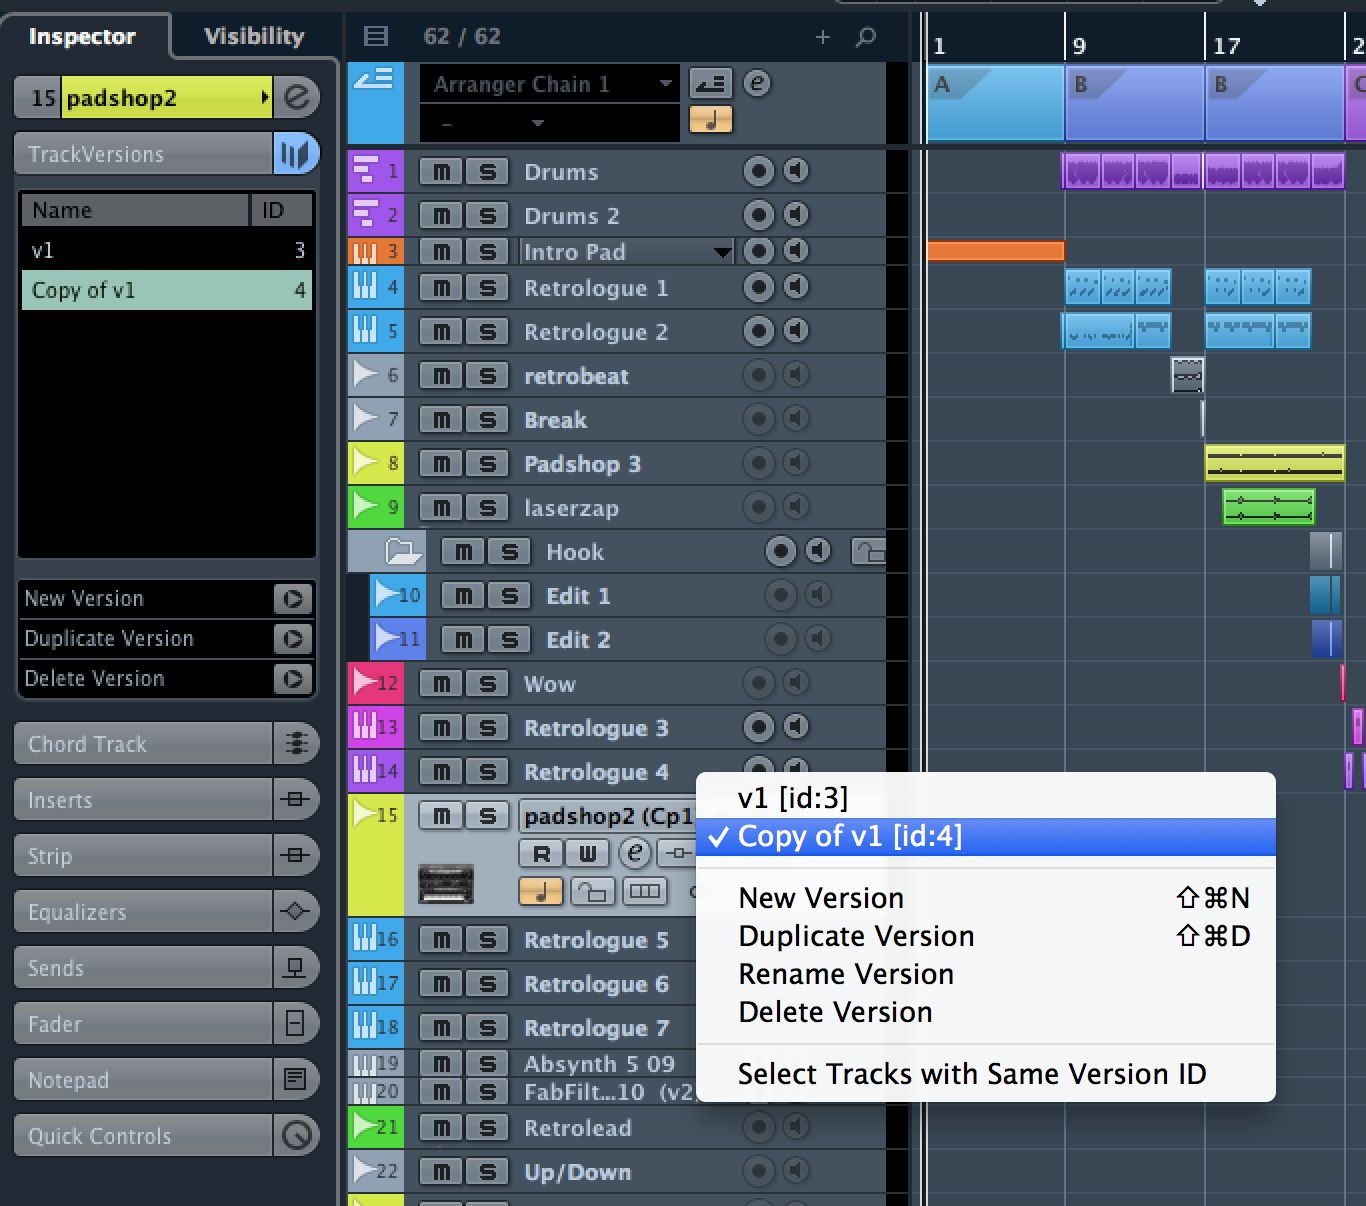
For almost any kind of track in a project you can use the Track Versions feature to create multiple versions of a track without actually duplicating any tracks in Project view. This means that you can try different edits and recordings of a part while maintaining the same effects chain and without filling up your screen with loads of duplicate tracks. Toggling between them is easy and you can always rename or delete them if you decide you want to stick with one particular take.
Tip 4 - Manage Preference Sets
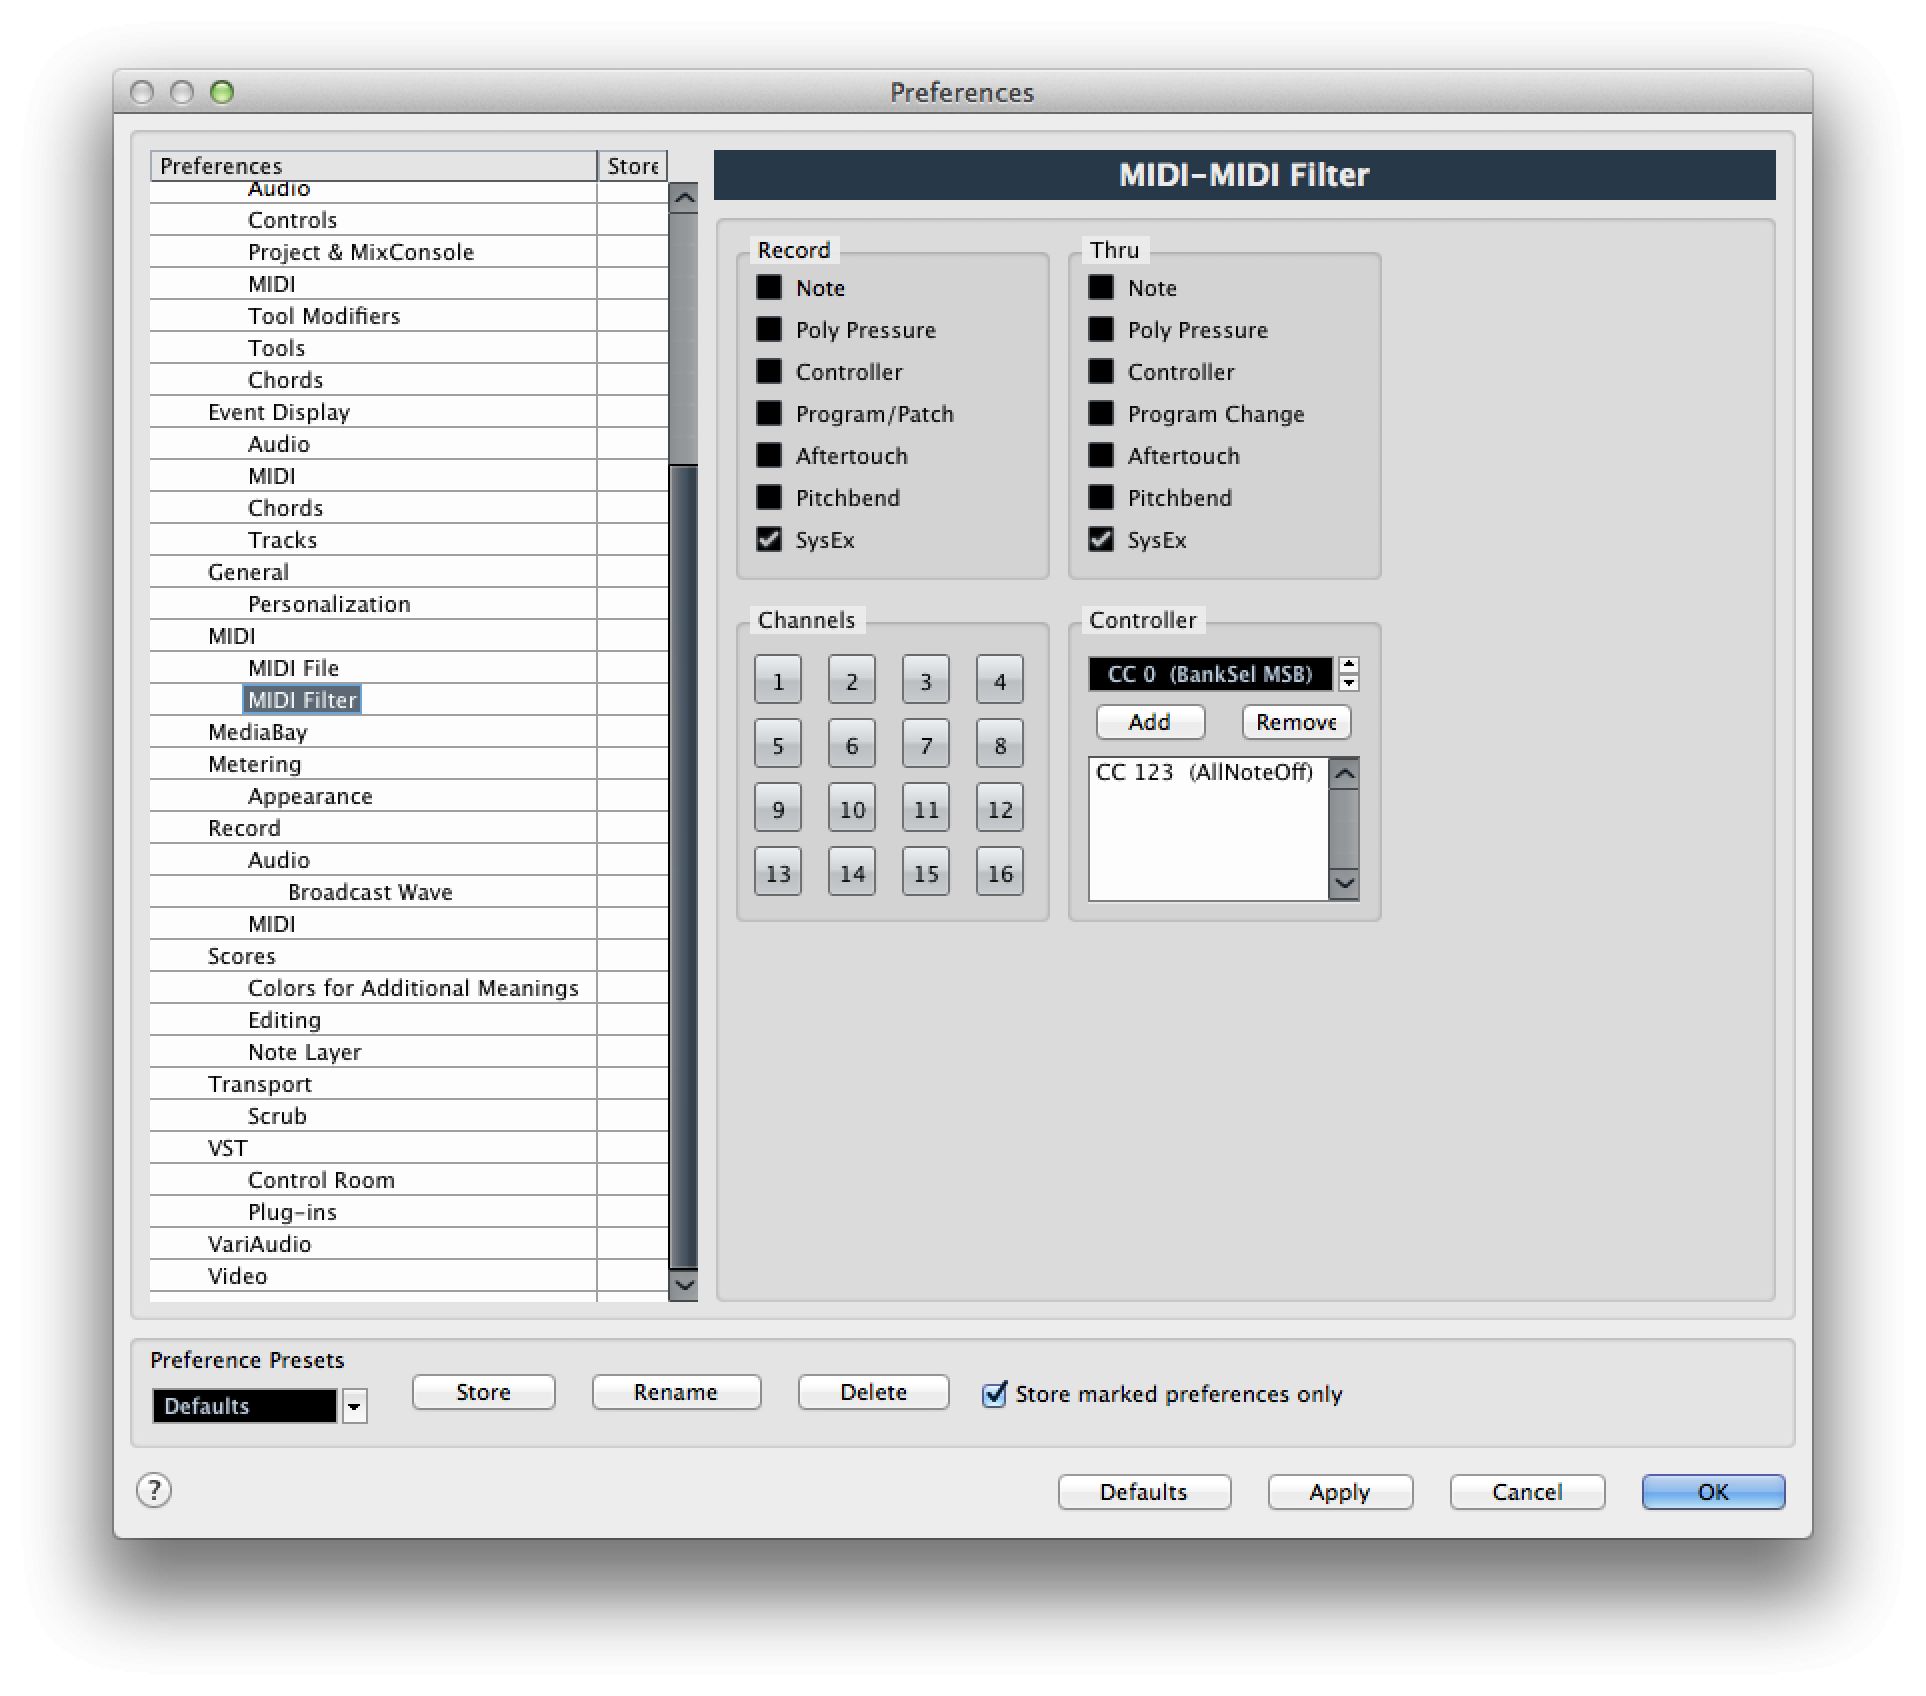
This one is a bit dry but it's still useful. In the preferences, you can store different sets of presets and toggle between them. This is handy for example if you have several people working on a single machine, each of whom likes their Cubase setup to behave in a specific way. If you activate the “store marked preferences only” option you can choose to store only some preferences but not others.
Tip 5 - Use MixConsole's powerful viewing options
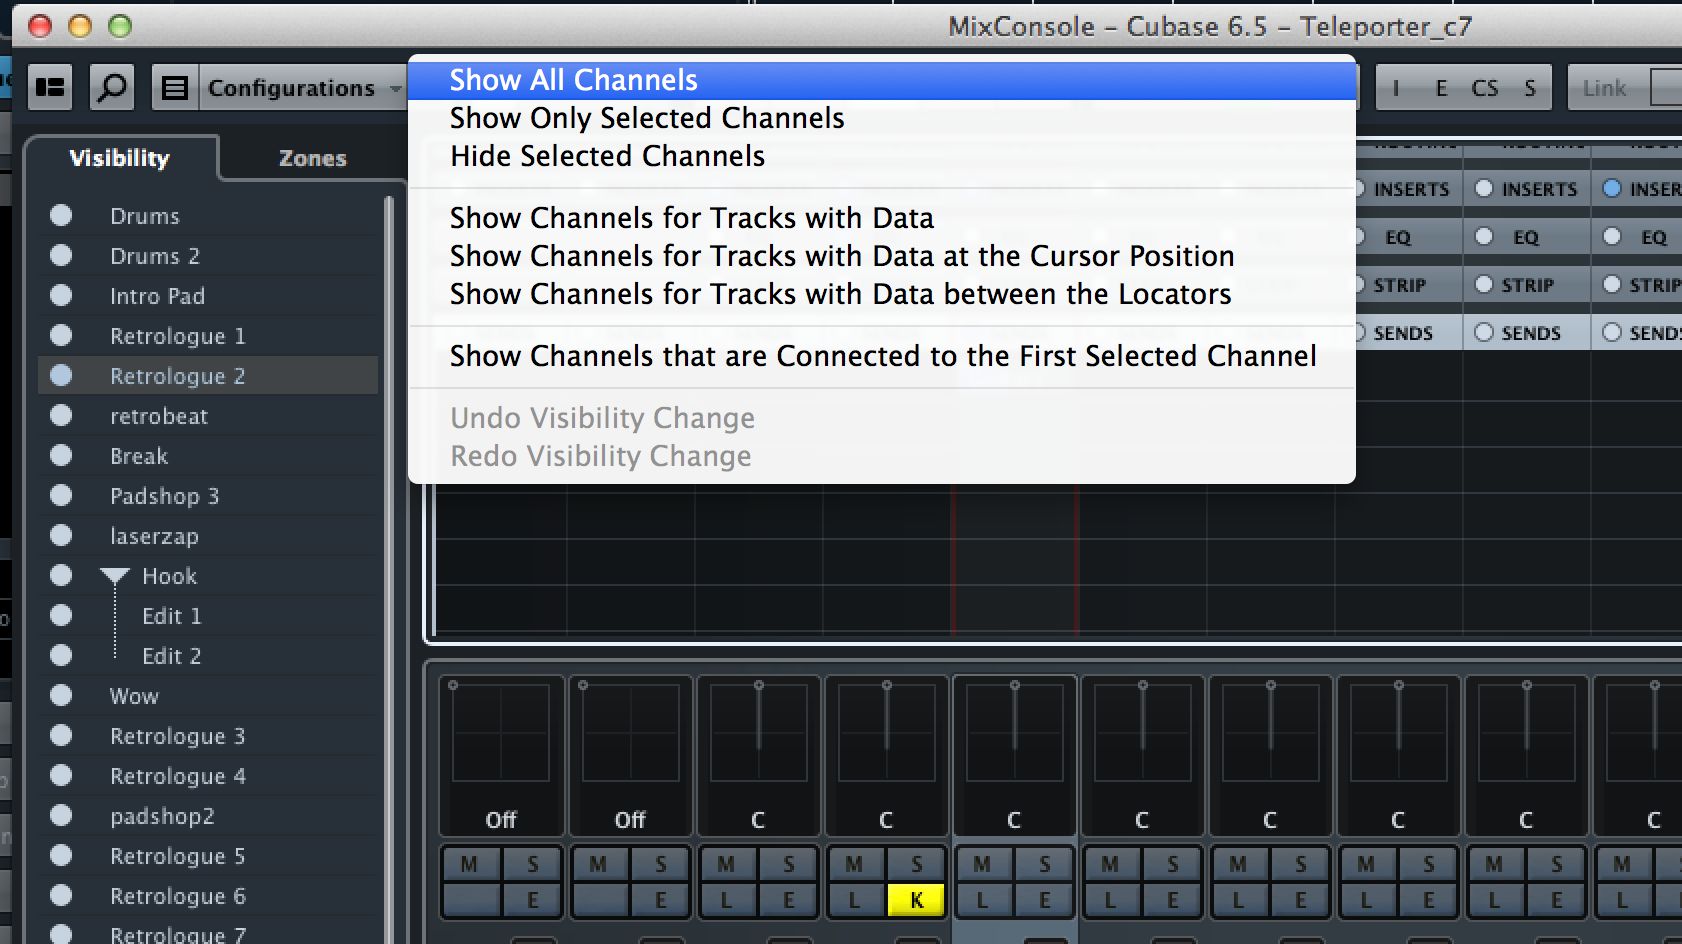
Projects with lots of tracks can quickly become hard to navigate. Luckily in MixConsole if you click on the Channel Visibility Agents button at the top left, you can choose to filter the view to show only the stuff you want to see at any given time. Amongst the helpful options here are the ability to show only tracks with data on them, only tracks with data at the point where the cursor is currently placed, and only channels that contain data anywhere between the two cursor points. These could be used to quickly filter out empty tracks, or to only show channels with data on them for the purposes of mixing.
Tip 6 - Use Right-Click Shortcuts
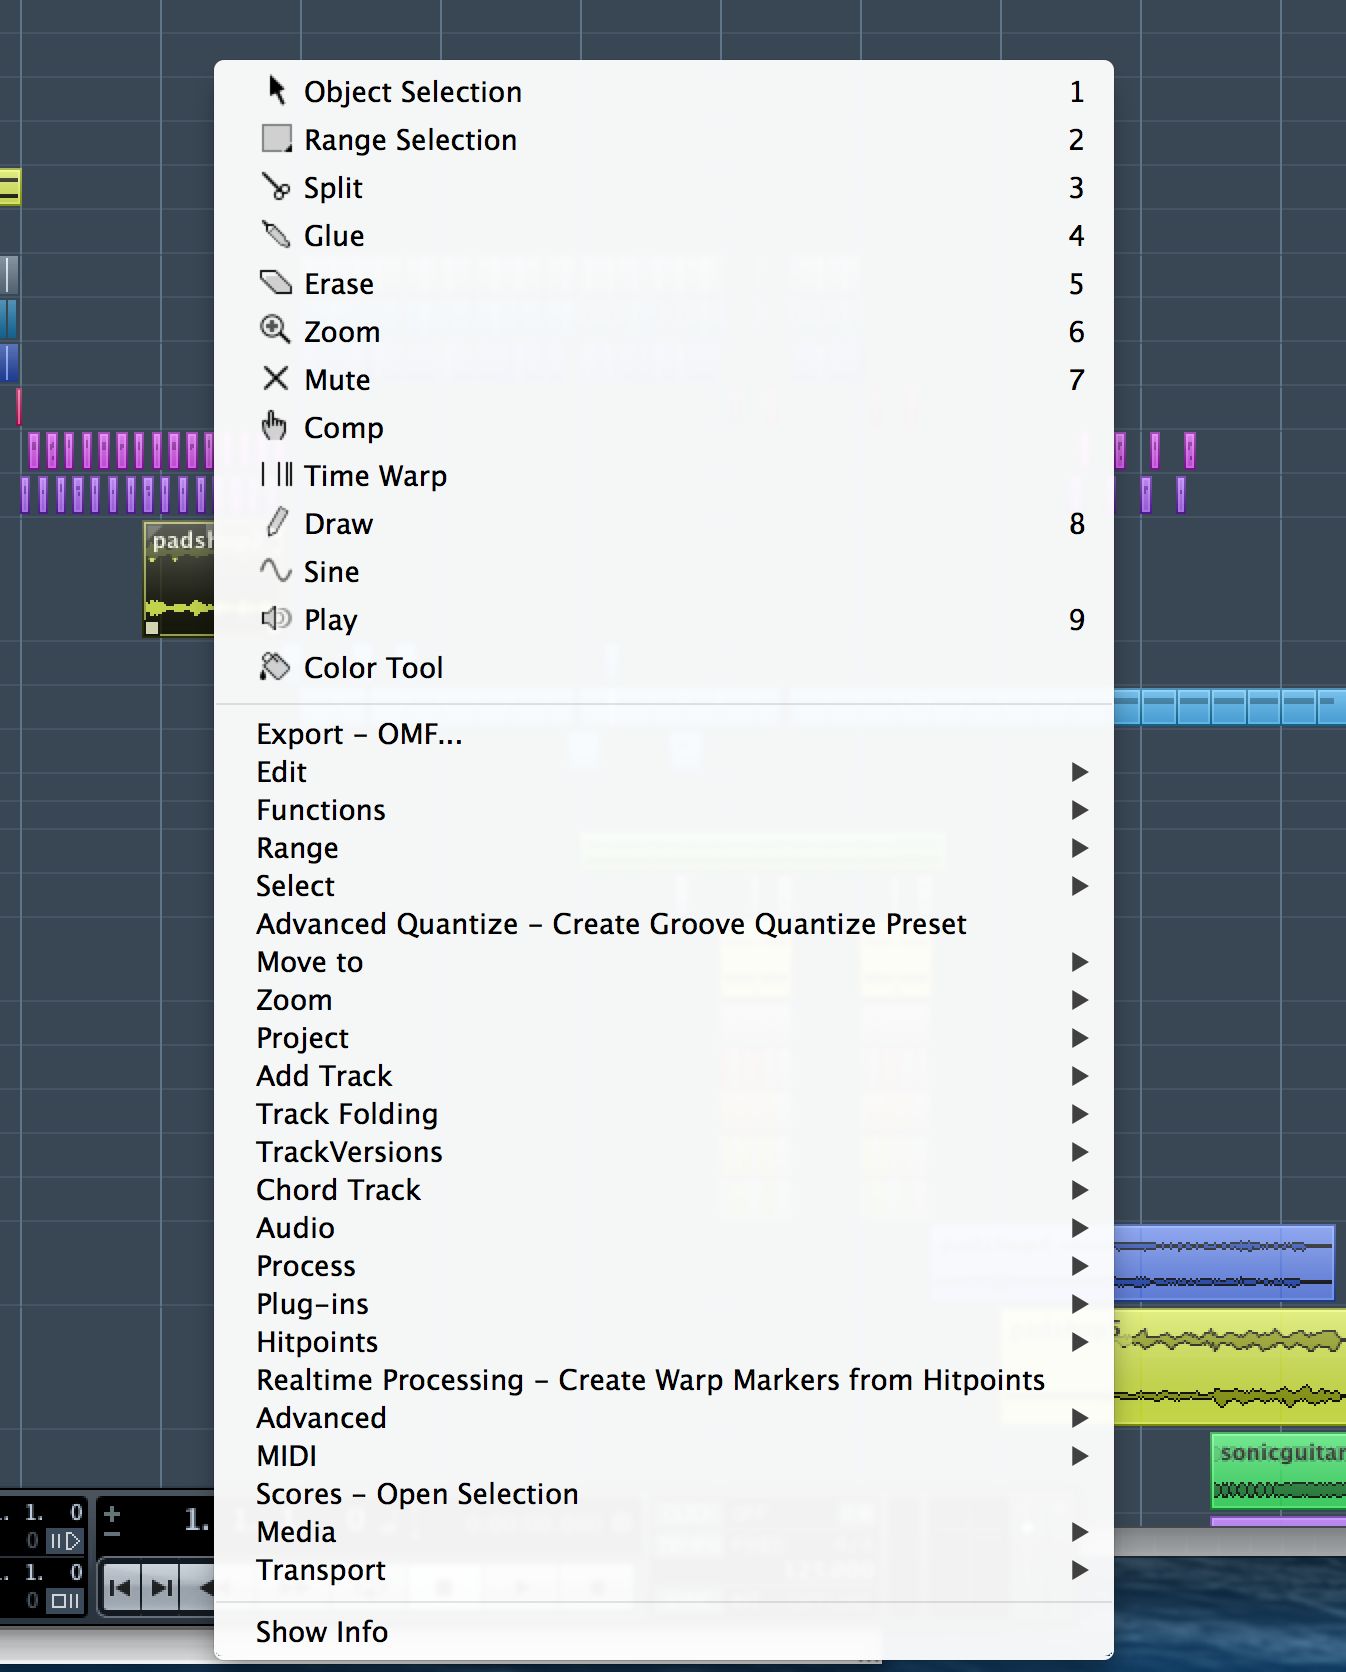
Cubase makes extensive use of right-click menus and there's an insane amount of stuff you can access quickly by right-clicking on any data in a project and choosing from the myriad menu options that appear. In the upper part of this menu are tools that relate to the kind of data you've selected, be it audio, MIDI or video. Underneath is a range of system tools that you'd otherwise have to go to the menu bars at the top of the screen to find. You can actually restore the old style Cubase right-click behaviour by going to Preferences > Editing > Tools and choosing “Popup toolbox on right-click”. This calls up a much smaller bar of editing tools which has far fewer options, but is sometimes better for performing quick edits. It's also preferred by some old school Cubase heads.
Tip 7 - Virtual Keyboard
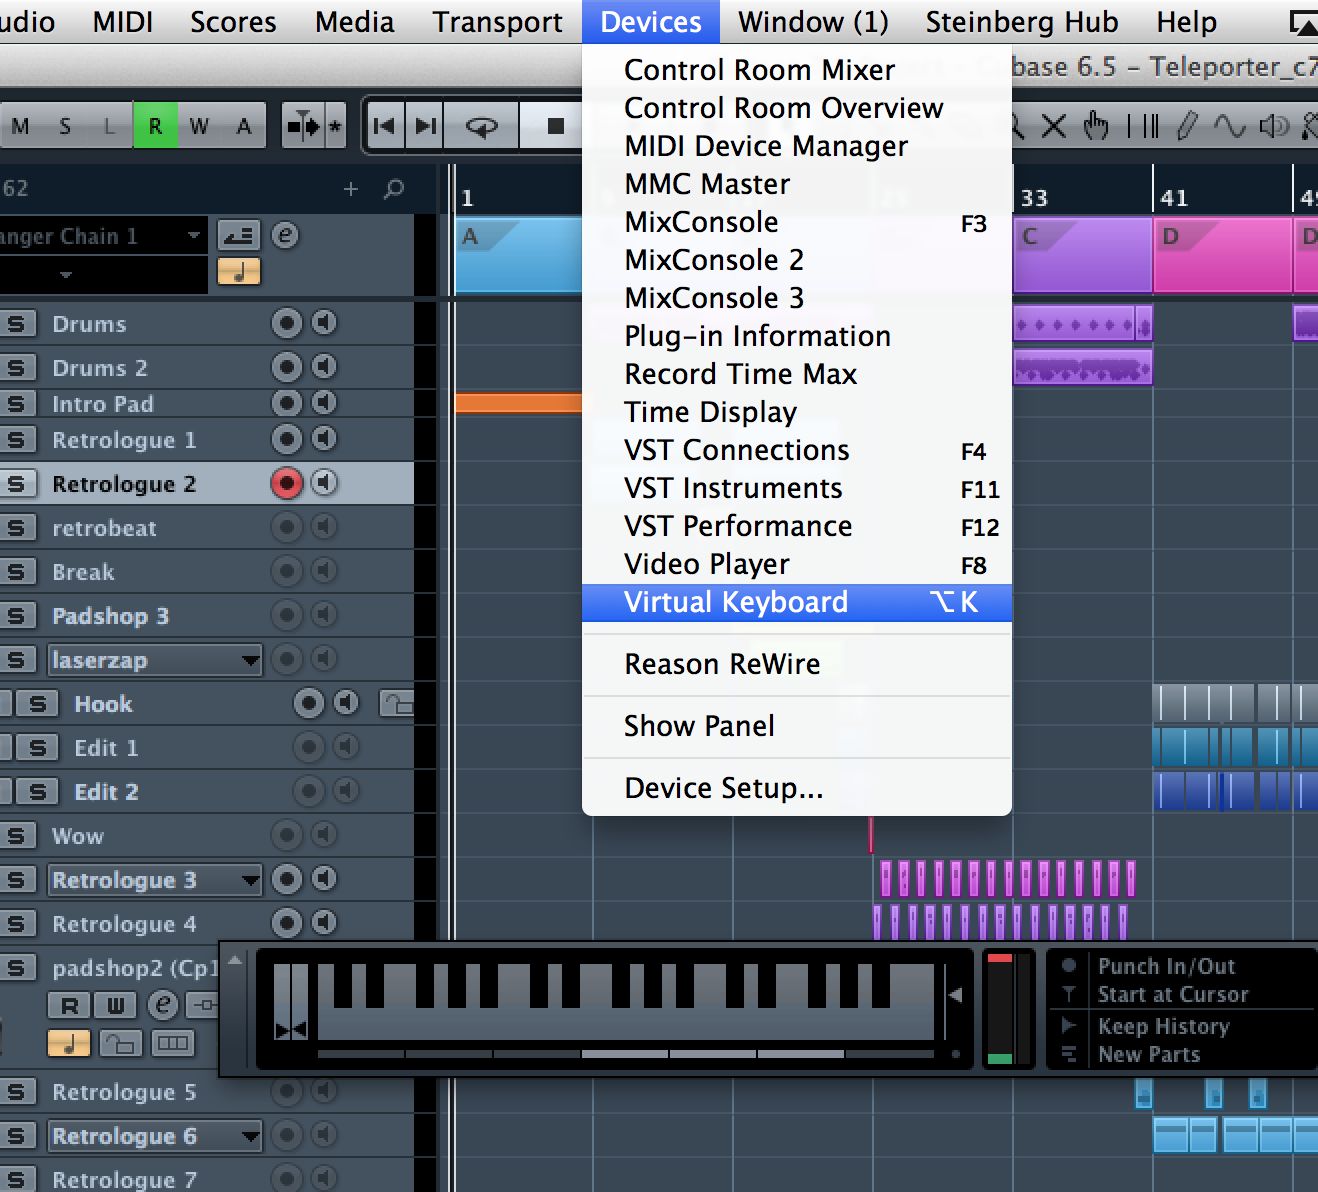
There are many situations in which you might not have a MIDI keyboard directly to hand and connected to your computer. If you're working away from your studio or on the move for example, or even if your keyboard is on the other side of the studio. If you want to program simple parts or even just trigger a few notes to audition a virtual instrument patch or check that sound is being produced correctly, go to the Devices menu and choose Virtual Keyboard, which will appear in the Transport panel. Although small, this is really useful and has velocity, sustain and octave controls and is playable using the mouse or more usefully, your computer's letter keys.
Tip 8 - Use Mediabay
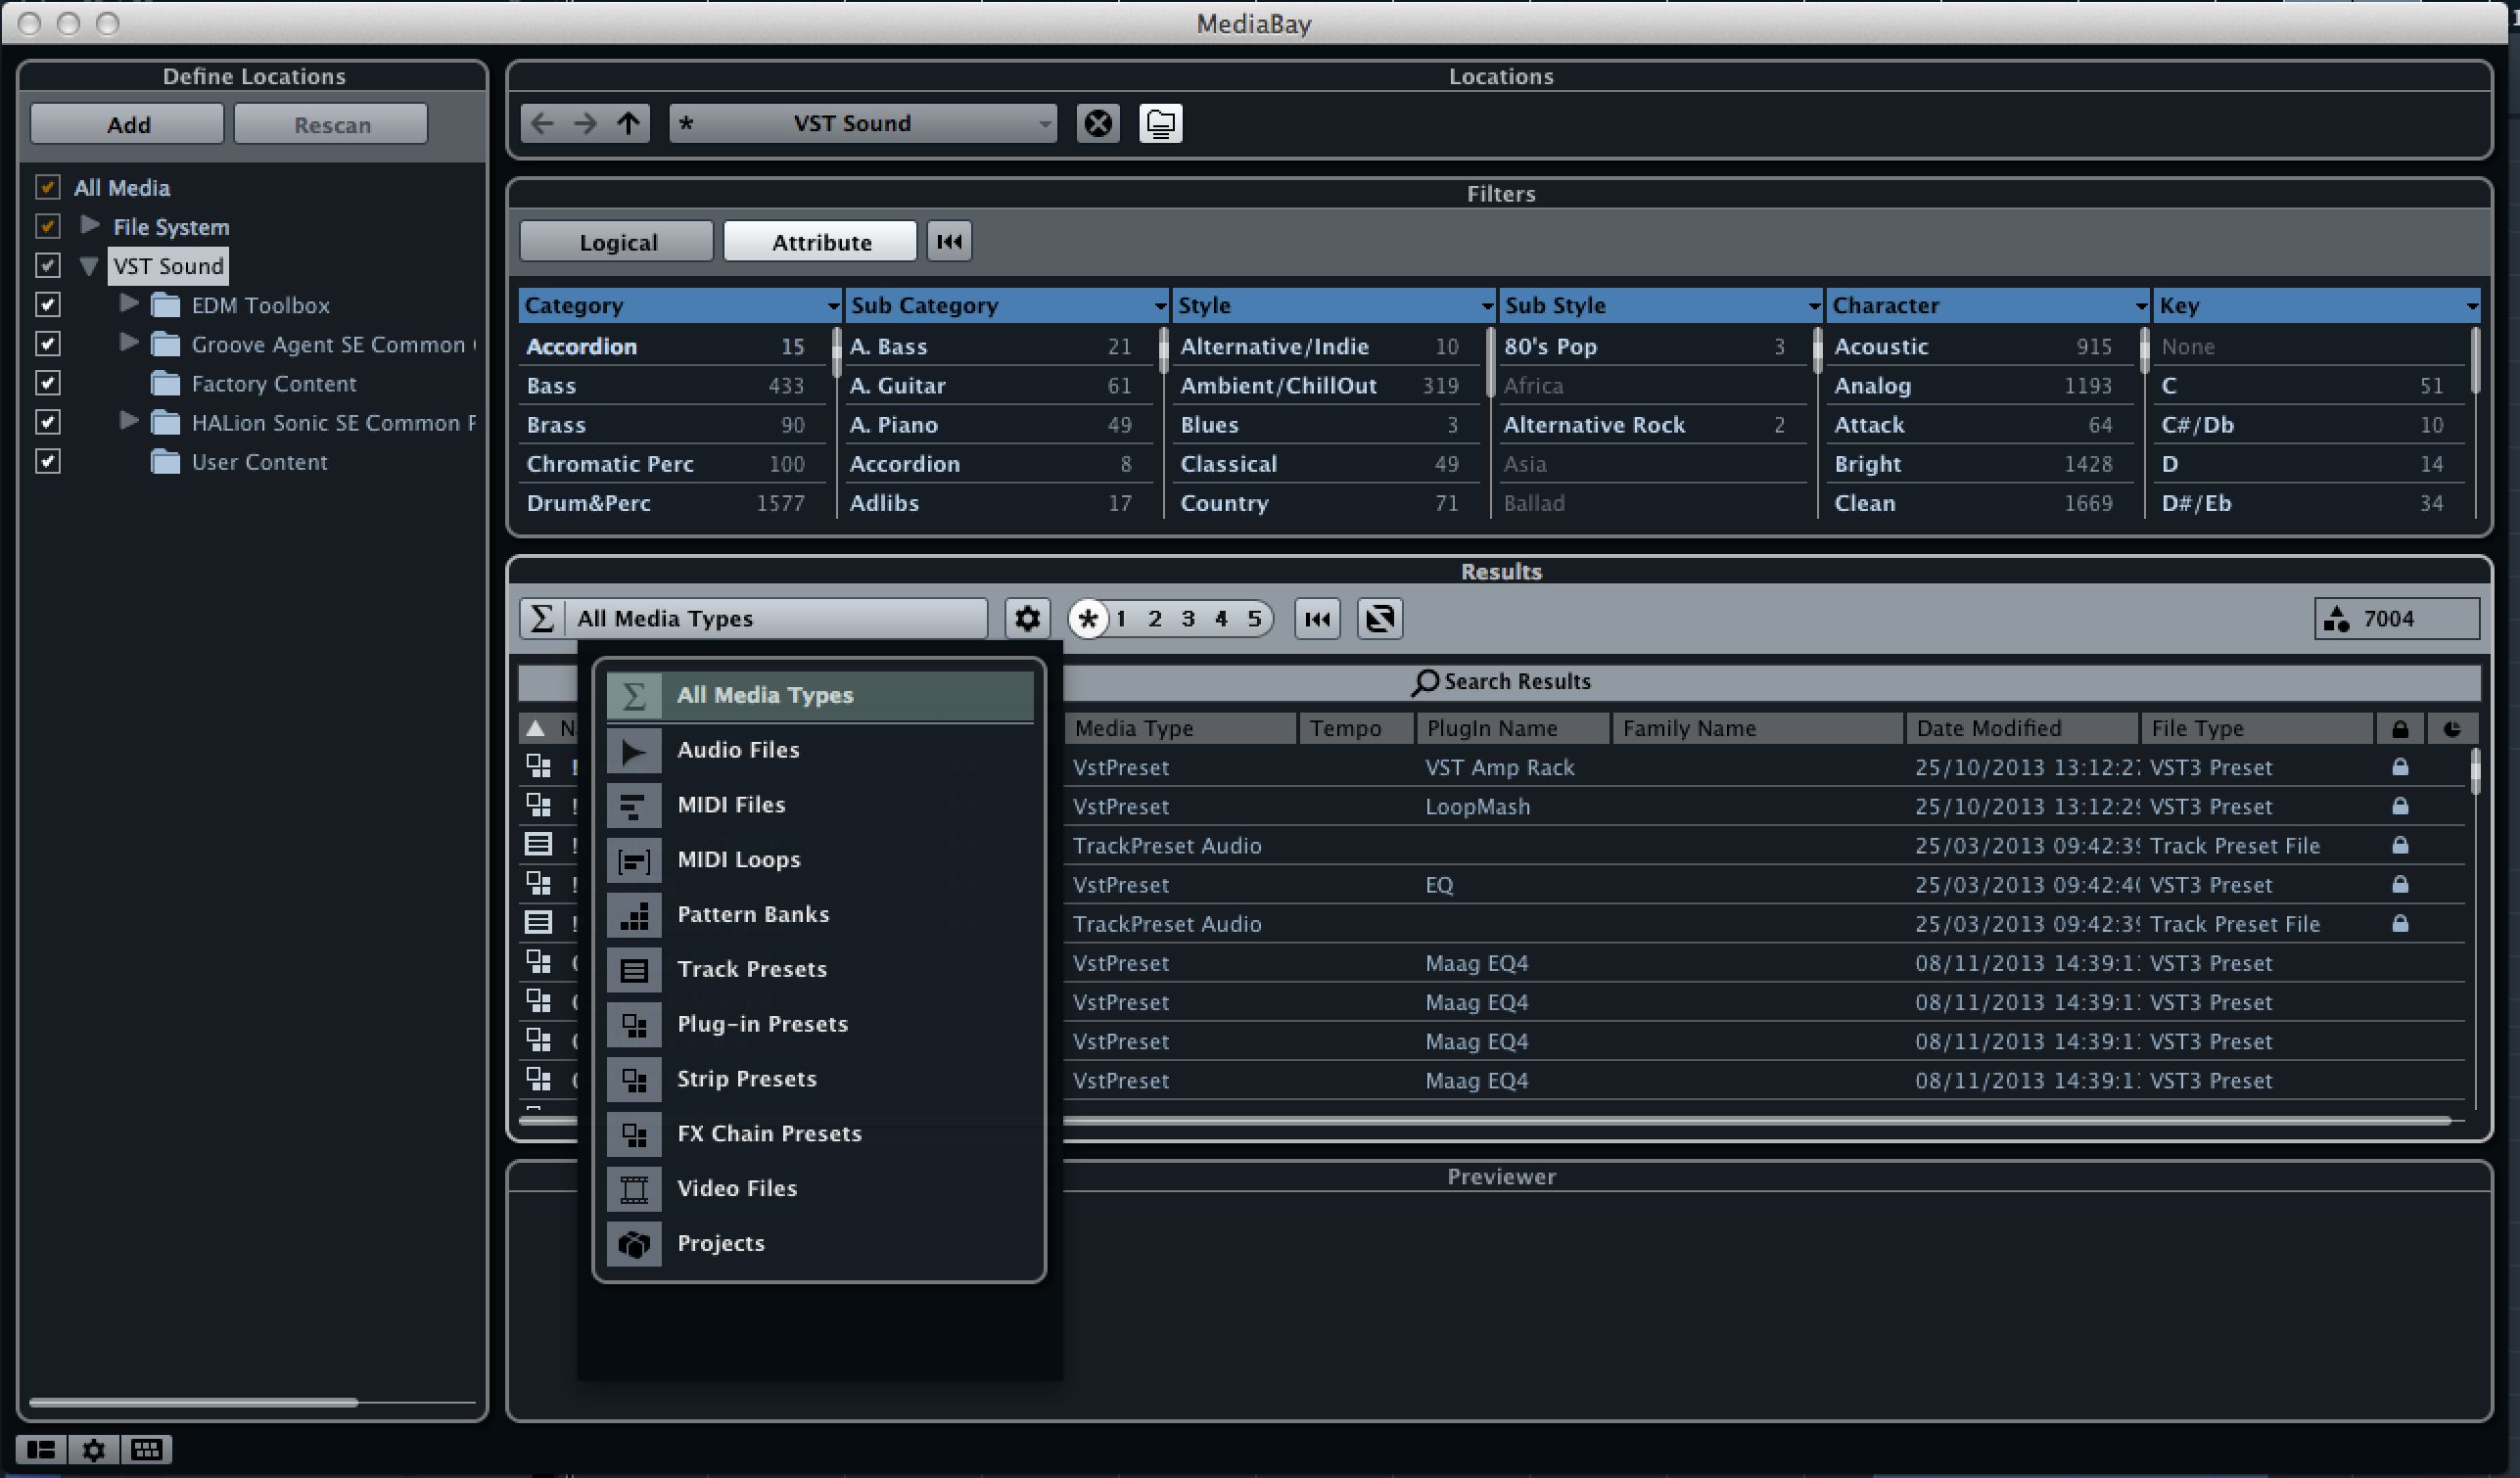
You can just load data from your hard drive, but Cubase's powerful Mediabay content management system makes tagging and organizing stuff easy and is a much more efficient way to keep a handle on things. As well as standard stuff like samples and MIDI loops, it can also help you organize patterns, plug-in presets, channel strip presets and entire projects amongst other things, with full tagging support and a filter system to help you find things quickly and easily.
Tip 9 - Manage your Title Bar
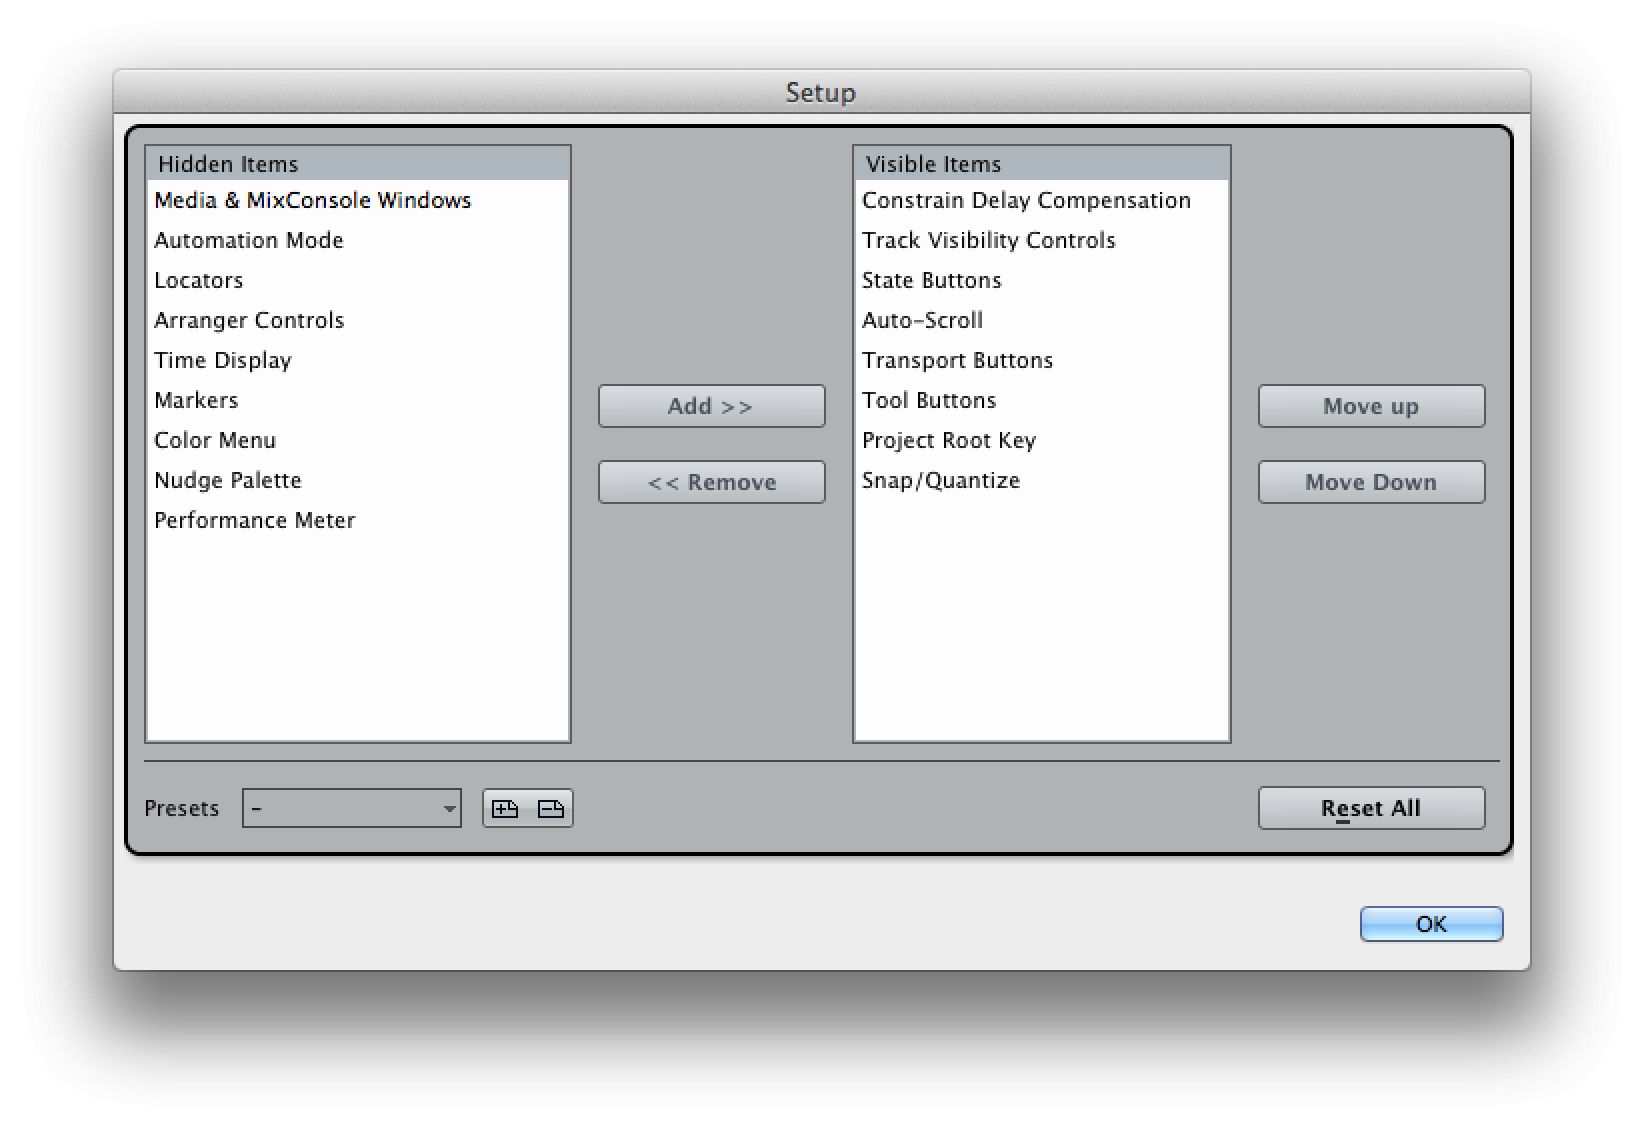
You may not have known that the area at the top of the Project window where many of the tools live is user-configurable. Right-click in an empty area of the title bar and choose Setup to reveal a configuration window. Here you can choose which items are visible and which are hidden as well as what order they appear in, and even store multiple presets to quickly switch between tool sets. You can also quickly show or hide sections by right-clicking on any item in the toolbar.
Tip 10 - Use the Steinberg Hub
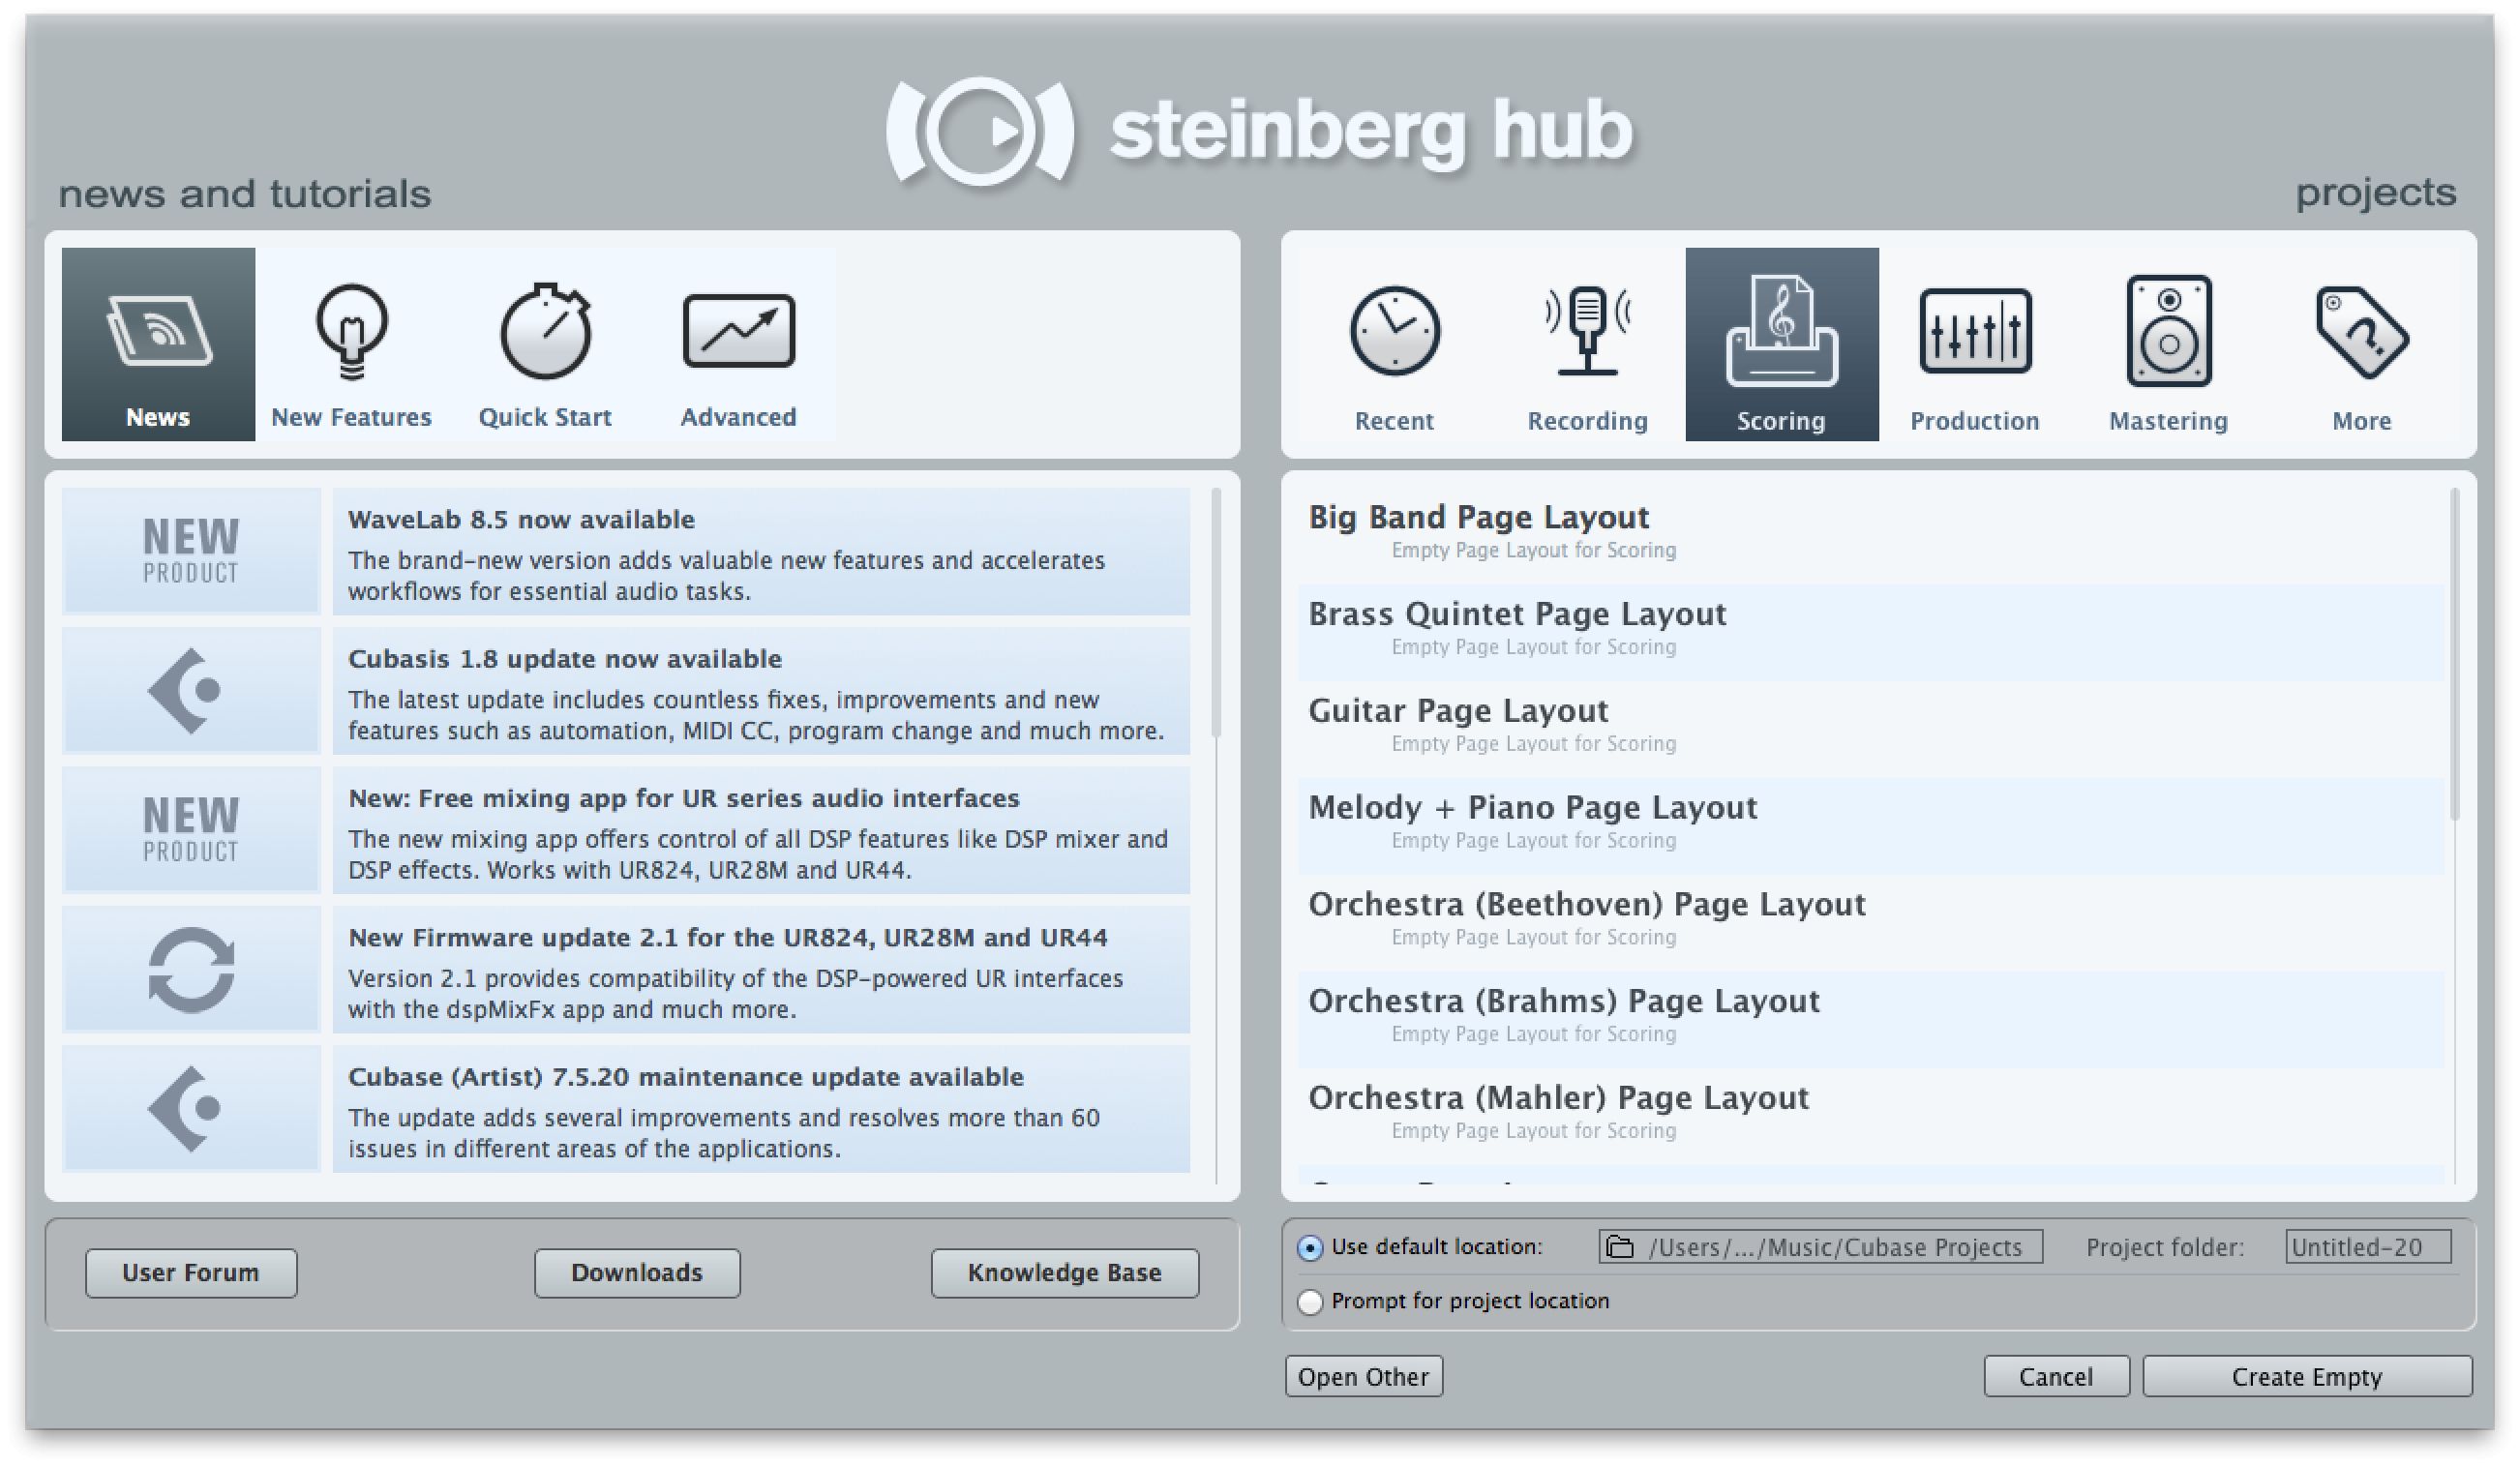
This is on by default but if it's not you can re-activate it in the Preferences > General section. As well as providing up to date news about updates to Cubase, it's where you can load templates and set the default template location. Using templates is a great way to quickly start a project without having to do lots of tedious adding of tracks and routing first.


 © 2024 Ask.Audio
A NonLinear Educating Company
Discussion
Want to join the discussion?
Create an account or login to get started!