
One area that I’ve found that holds a lot of people back from using the Combinator for creating keyboard patches for live performance is the confusion in how to map a synth or drum patch to a certain set of keys without having to completely reprogram the patch within the Combinator supplying the sound! In this tutorial I’d like to show you how to easily incorporate any favorite patch into your live performance Combi patch, as well as a few ways to make it more performance friendly!
Step 1. Grab a Couple...
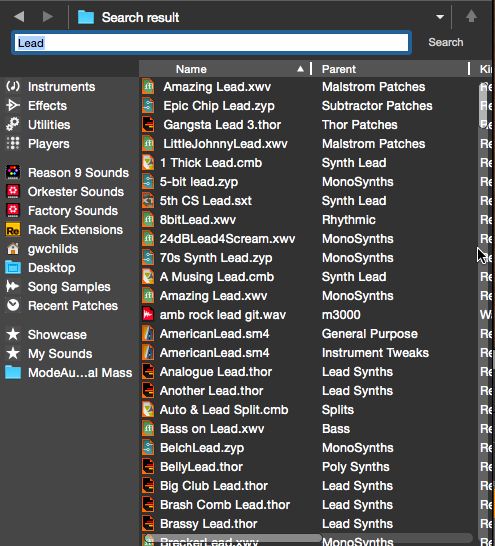
When I begin making my performance Combinator patches, I generally like to start off by making a rough outline of the main instruments that I’d like to schedule for each song within my set. The Reason browser is really handy for this, because of its search ability as well as another smaller feature that really keeps me organized - the Favorites List.

It actually makes for a leisurely session of pre-planning as well. By running a playlist of music that I’ll be playing for the upcoming performance, I can go through each song and find instruments that match, or are similar to parts that I’ll be using during my performance. I can do a search for lead synth, audition and feel the patch out. If I decide it will work, I can create a Favorites List, using the + button at the bottom of the Reason Browser.
Name it for the show I’m playing...
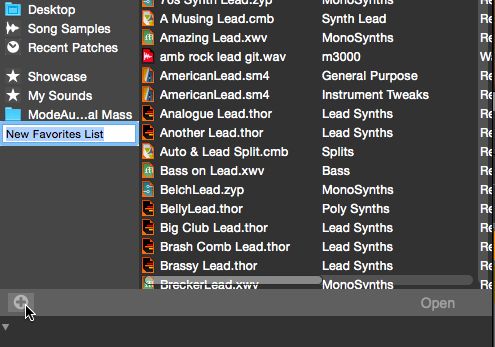
And then drag the patch, from the Browser into the playlist.
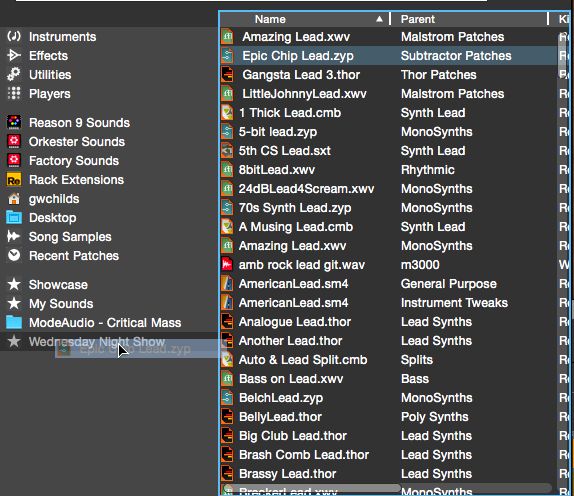
The Favorites Lists will keep the patches in the order in which I dropped them in and will even allow me to change the order by dragging the patches around within the list. When I need multiple patches to exist on one keyboard together, I’ll create a Combinator.

But before I can drop one of patches in, there’s one thing I have to do. Or nothing will work right.
Step 2. Mix It Up!
It’s important to remember that the Combinator is literally another rack, inside the Reason rack. That being said, within the Combinator signal flow must still be observed. If you’re going to throw multiple synths in to a Combinator,you need to be able to mix them! Don’t forget to drop in either a Mixer 14:2 or a Line Mixer 6:2, or you will most likely only hear one synth within your Combinator. I recommend the Line Mixer as it uses less processing power. If you simply create one of these first Reason will mostly handle the audio routing within your Combinator. If you forget it simply won’t work. So don’t forget!

Now I’m safe to drag my first patch in from the Favorites list I made for my show, in to the small black hole that appears at the bottom the Combinator, under the mixer. A plug sign graphic will appear within the area.

I’ll add a bass synth to my Combinator in my live patch as well. Now the synth and lead part play on top of one another. Now of course we need to map. Don’t worry, it won’t be too scary.
Step 3. Map
Once I press the Show Programmer button on the Combinator, I see the screen that will fix everything. I know I want to play my lead synth in the upper octaves of my performance keyboard. So I’ll select my lead within the Programmer and then use the horizontal slider at the top of the programmer screen to scroll to the lower and upper handlebars of the lead patch, and restrict play area to a key range that will be comfortable for what I’m trying to play.
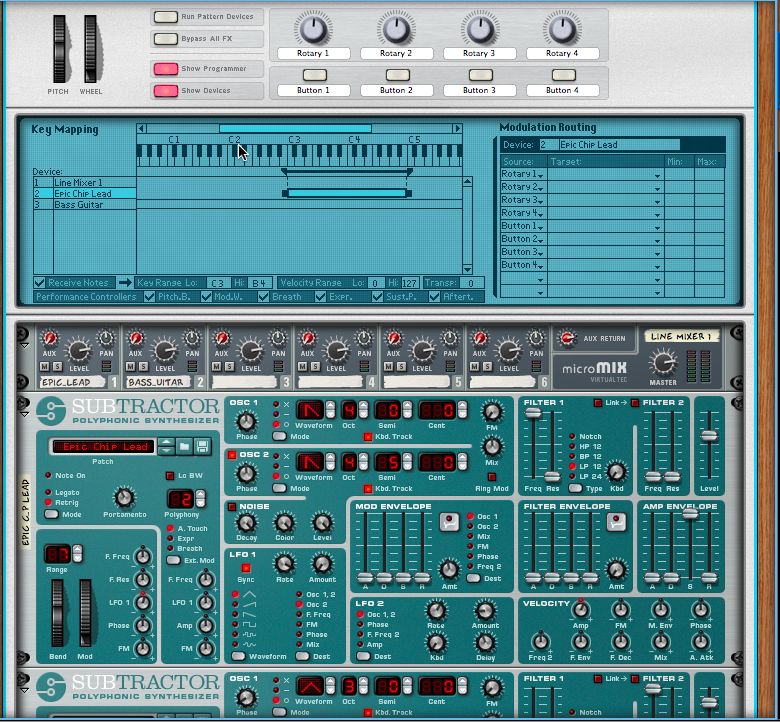
Now I need to set up the bass patch that I want to play in my lower octaves. Of course I’ll use the handlebars again to move the bass regions to what I think will feel right for my hands.
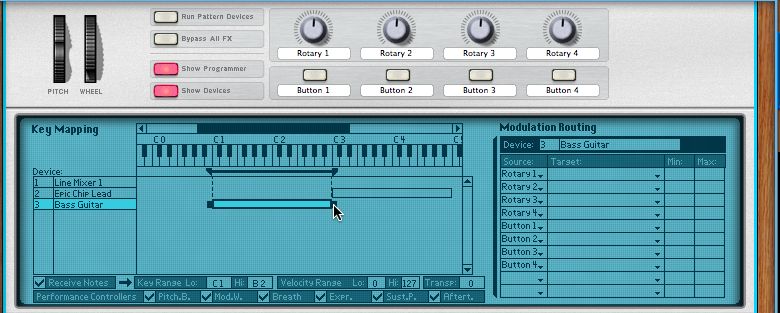
Okay, you’d think everything would be perfect from here. But here’s where most people get really frustrated with the Combinator and give up. When you drop an instrument in to a Combinator, by default, and even with mapping already taking place on the Combinator keyboard it still plays within the same key range that it would play in if you brought the lead or bass patch in question in to a regular Reason rack.
Step 4. Transpose
This step is the missing link. In my current case, the bass patch (Bass Guitar), when I play in the Combinator assigned octaves, is too deep. And has that crunchy unlistenable quality that bass synth patches get when you play them in too low of an octave. The temptation is to adjust Bass Synth Subtractor within the Subtractor Oscillator section. However, doing this does alter the patch. An easier way, and the best way, is to transpose the synth in the Combinator Editor.
I can select the Bass patch within the Combinator Editor and within the Editor, transpose the Bass Synth. This allows me to play in an octave that was previously unavailable, as the Combinator’s now playing the internal Bass Synth patch, one octave up.

This is helpful for bass patches and extremely helpful for lead patches as well. For example I may not want to play my lead parts in such a high octave. Maybe I want to play in a beefier area of the lead patch. In this situation I can transpose the lead patch down so that now the Combinator focuses on a middle octave that may sit a little better in the live arrangement.
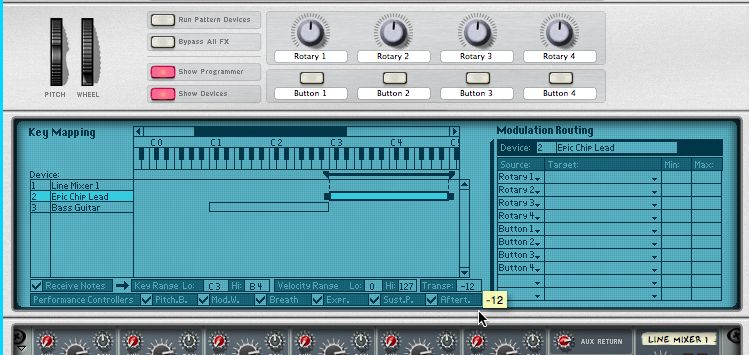
Transposing also allows you to bring in one shot sounds, like drums, and map them to specific keys. For example assigning the Redrum Drum Channel number 1 trigger to the C6 key of a Combinator: something that’s impossible for a Redrum patch outside of a Combinator.
Conclusion
If you find yourself in a spot where you need a few different types of synths or several, all needing to be triggered off of one MIDI controller, the Combinator is a great choice. Just don’t forget to lay down a mixer and make sure you transpose! This will allow all your internal live synths to coexist peacefully and make you feel incredible by literally having your main synth patches, side by side, on one keyboard.

Discussion
Want to join the discussion?
Create an account or login to get started!